Enable CI/CD in OpenShift 4 using S2I and Webhook

Source-to-Image (S2I) is a framework that makes it easy to write container images that take application source code as an input and produce a new image that runs the assembled application as output. The main advantage of using S2I for building reproducible container images is the ease of use for developers.

As a developer, you don’t need to worry about how your application is being containerized and deployed, you just need to work on your code then deliver to Github. OpenShift will take care of the rest, to make it available to end users.

In this tutorial, we will discuss about how to deploy a Golang web application on OpenShift 4 via source to image (aka s2i) framework. We will also talk about how to enable CI/CD using webhook

Here is the architecture overview of the tutorial

Architecture Overview

Note: I use MacOS for this tutorial, and you can find details in my Github repository as well: https://github.com/dnguyenv/spirited-engineering-go.git

Prerequites

  • A OpenShift cluster
  • Github account (https://github.com)
  • OpenShift cli client (aka oc) (run $ brew update && brew install openshift-cli on your Mac terminal

The app

The example application used in this tutorial is a simple Go web app that has a menu to navigate among different pages. The Register page is an html form for the user to submit a name, then the Go server code handles the request and sends the name back for displaying on the page. The app covers how to work with templates in Go.

Here is the structure of the code

Code structure
Code structure

As required by s2i framework, we need to provide assemble and run scripts as minimum to instruct how the code is built and how the built code is executed

assemble script:

#!/bin/bash
set -e
echo "---> Preparing source..."
mkdir -p $S2I_DESTINATION
cd $S2I_DESTINATION
cp -r /tmp/src/* $S2I_DESTINATION/
go build -o /opt/app-root/goexec .

run script:

#!/bin/bash -e
cd $S2I_DESTINATION
/opt/app-root/goexec

Notice that you can put all environment variables necessary for the scripts in the environment file placed in .s2i directory

You can fork the code from here to your git and modify based on your needs: https://github.com/dnguyenv/spirited-engineering-go.git

Login to your OpenShift cluster

$ oc login -u <your-user> -p "access-token" \
https://<your-cluster-api-url>

Example:

$ oc login -u kubeadmin -p "token" \ 
https://console-openshift-console.apps.se.spirited-engineering.os.fyre.se.com:6443

Create new project

$ oc new-project <project-name>
$ oc project <project-name> #Switch to the newly created project

Example:

$ oc new-project spirited-engineering
$ oc project spirited-engineering 

Create new application under the current project

$ oc new-app <your-git-hub-repo-uri> --name <your-app-name>

Example:

$ oc new-app https://github.com/dnguyenv/spirited-engineering-go.git \
 --name spirited-engineering-go

Configure OpenShift resources of the app to make the app accessible from outside

Expose the deployment config of the app as a service:

 $ oc expose dc <your-app-name> --port <a http port>

Example:

$ oc expose dc spirited-engineering-go --port 8080

Create a route with tls termination enabled

$ oc create route edge --service=<your-service-name> --port=<a http port>

Example:

$ oc create route edge --service=spirited-engineering-go --port=8080

Access the app

Get the route information

$ oc get routes
NAME                      HOST/PORT                                                                     PATH   SERVICES                  PORT   TERMINATION   WILDCARD
spirited-engineering-go   spirited-engineering-go-spirited-engineering.apps.se.os.fyre.se.com          spirited-engineering-go   8080   edge          None

You now can access your app from a browser with this url (HOST/PORT value in the output of oc get routes): https://spirited-engineering-go-spirited-engineering.apps.se.os.fyre.se.com

Here is what you may see from this Go web application example:

Running example application

Enable CI/CD

Now you have the application deployed from your source code on Github all the way to your OpenShift cluster. Lets do 1 step further to make the application deployed automatically whenever you’ve pushed changes to the code on Github. There are different ways to do that but in this example, I’ll walk you through how to do it with webhook

Get the webhook endpoint of the app

Assuming you’re still logged into your OpenShift cluster, run this command to get the webhook endpoint of the app

$ oc describe bc/<your-build-config>

The endpoint will show how under Webhook GitHub section. You can grep the URL against the output

Example:

$ oc describe bc/spirited-engineering-go | grep -E 'webhook.*github'

You will see something like this:

$ oc describe bc/spirited-engineering-go | grep -E \
 'webhook.*github'
 
output: URL: https://console-openshift-console.apps.se.os.fyre.se.com:6443/apis/build.openshift.io/v1/namespaces/spirited-engineering/buildconfigs/spirited-engineering-go/webhooks/<secret>/github

So now you need the <secret> value to have the complete webhook uri. You can find that out by

$ oc get bc/<your-build-config> -o template --template \
 '{{index .spec.triggers 0}} {{"\n"}}'

Example:

$ oc get bc/spirited-engineering-go -o template \
 --template '{{index .spec.triggers 0}} {{"\n"}}'
map[github:map[secret:<sometoken>] type:GitHub]

Configure webhook for your github repository

Once you have the webhook endpoint, you now can create a github webhook on your source code repository by going to https://github.com/<your-github-id>/<your-repo>/settings/hooks (example: https://github.com/dnguyenv/spirited-engineering-go/settings/hooks)

Something like this:

Webhook
Webhook

Now, whenever you push (or merge) any changes into your repository, the webook will send a payload to OpenShift to trigger a build and the changes will be packaged into container(s), deployed and serve the end users.

Install Red Hat OpenShift from scratch on your Laptop using VirtualBox and openshift-ansible

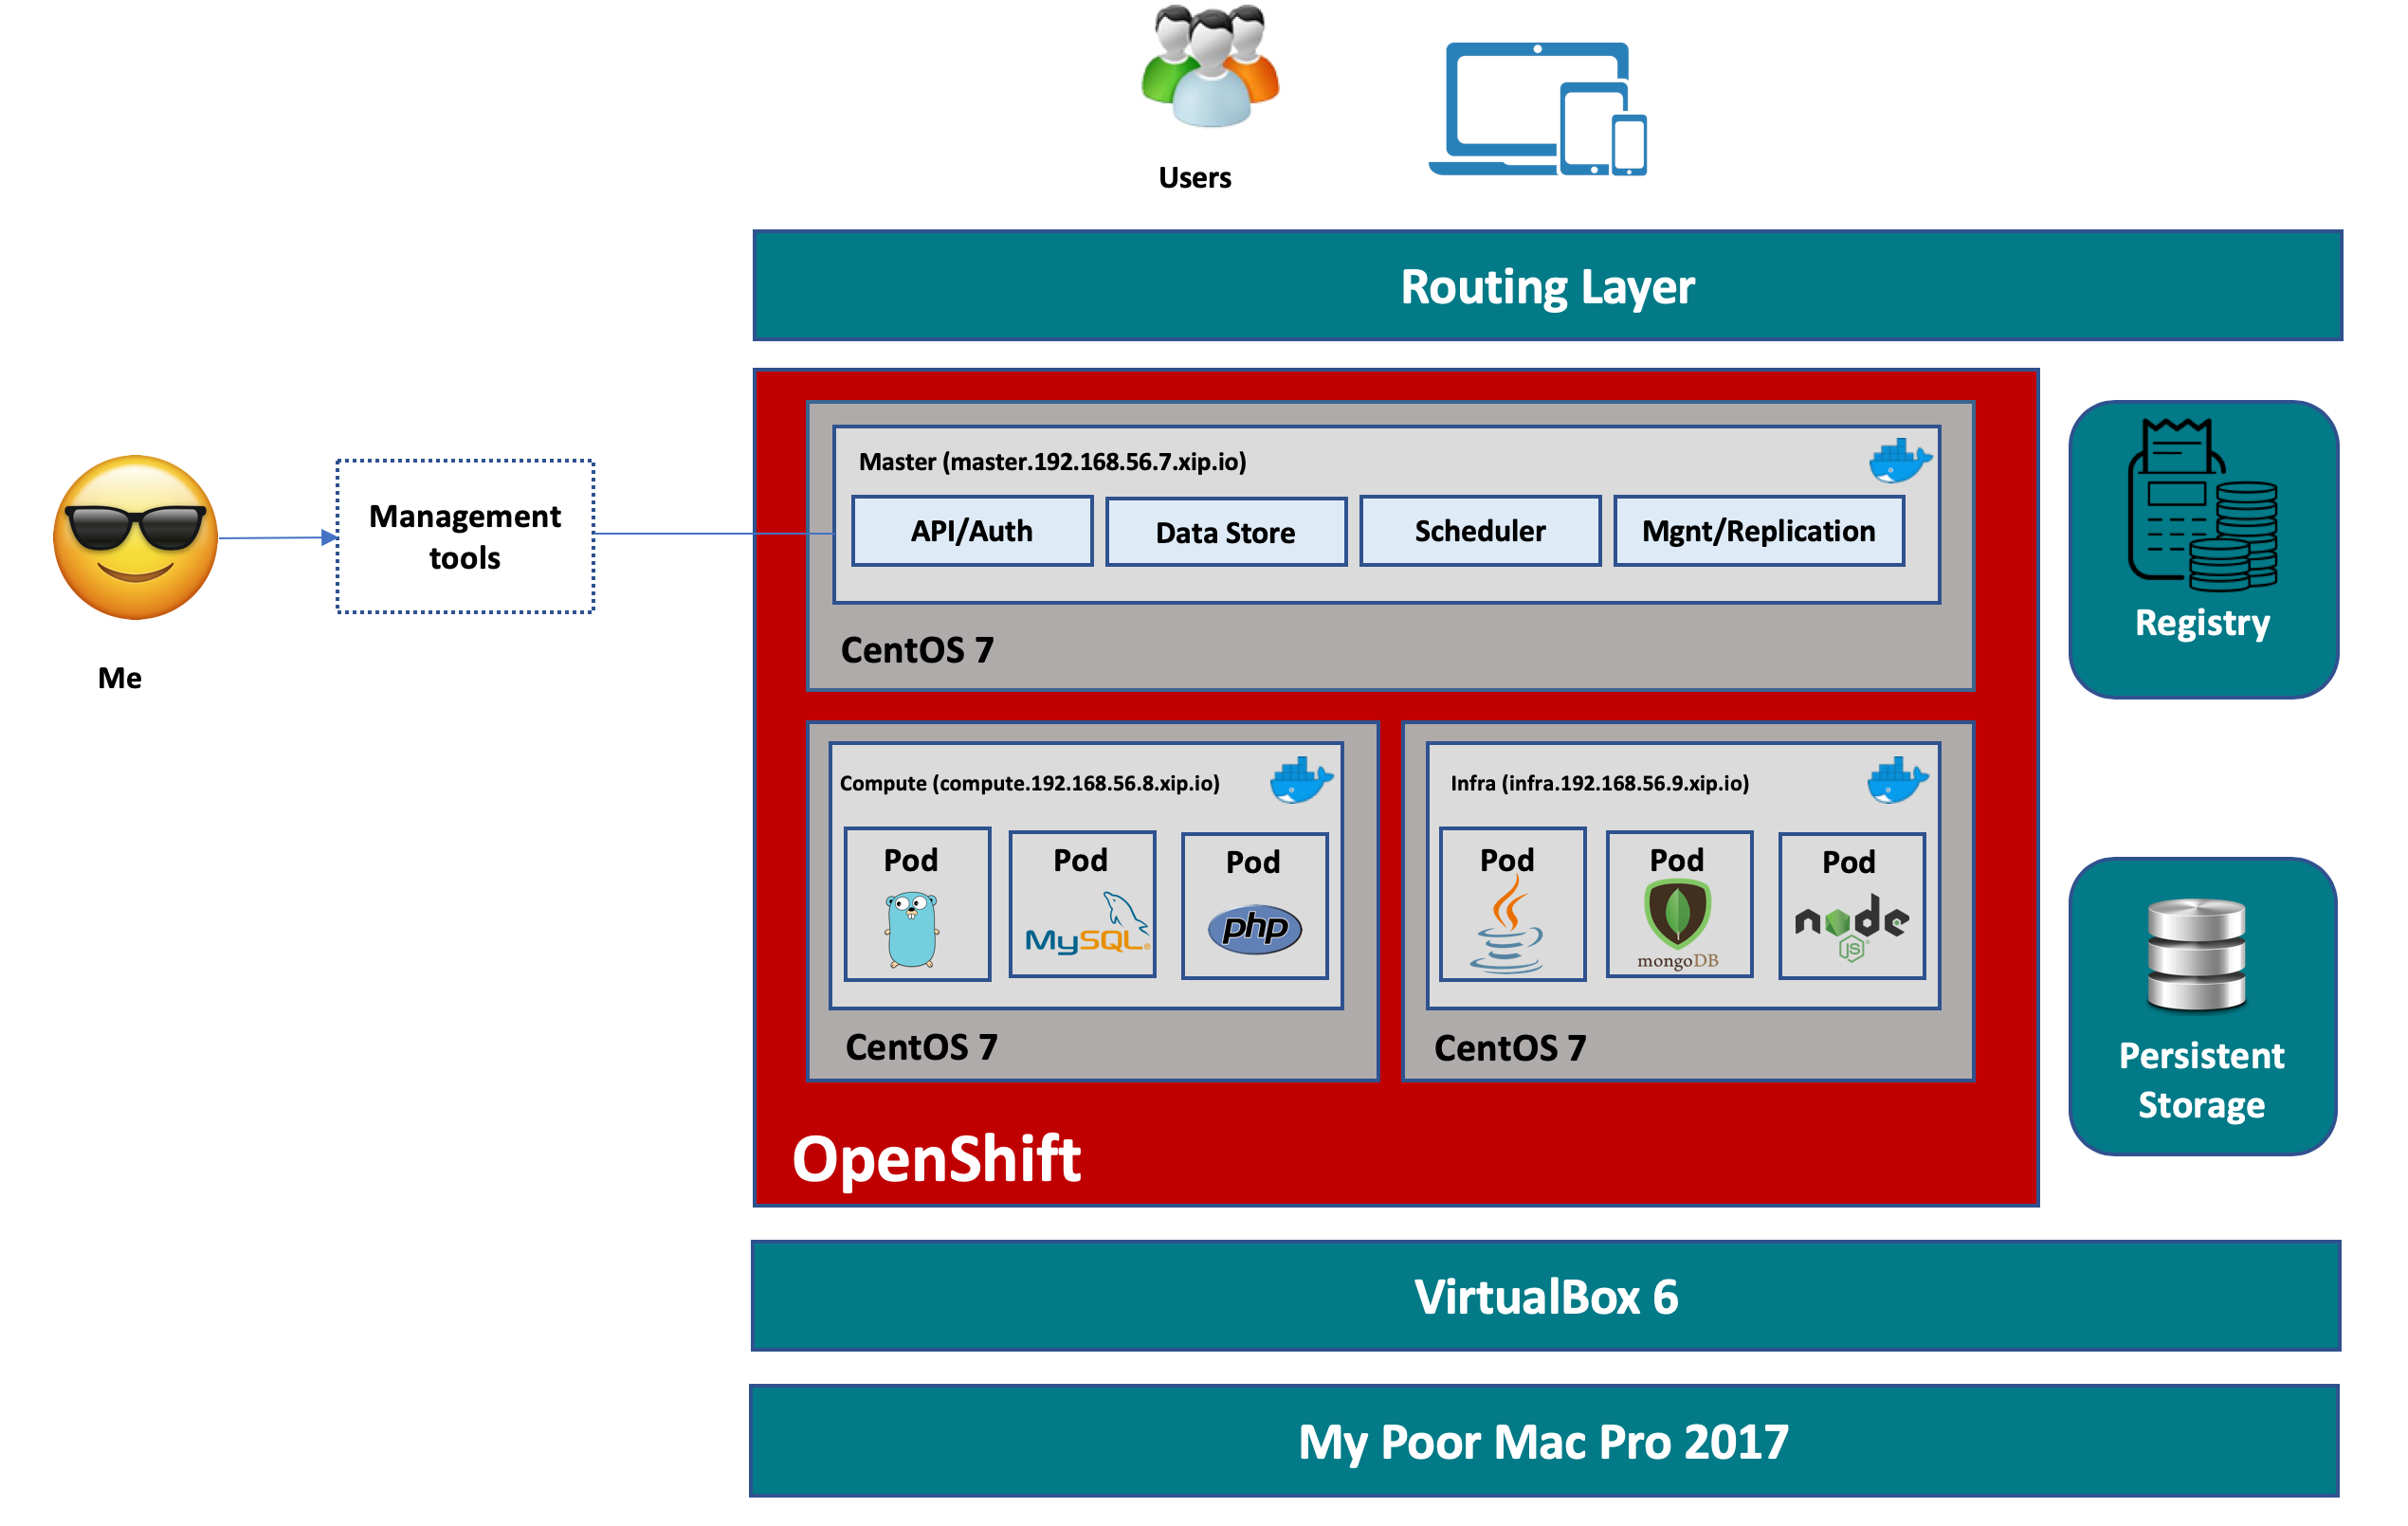
Despite the minimum infrastructure requirement for an OpenShift cluster is 4 CPUs, 16 GB RAM for master, 8 GB RAM for nodes, and a lot more, I decided to give it a go on my poor little Mac, using VirtualBox.

Here is how the cluster will look like:

OpenShift 3.9 on a Mac with VirtualBox

Prepare the VMs

In this experiment, I’m using VirtualBox 6.0 for Mac, and CentOS 7 Minimal base image for all nodes in the cluster. First we need to make sure all the nodes can communicate to each other and to the internet. I use NAT adapter to to enable internet connectivity from the VMs through the shared internet connection on my Mac, and attach all VMs to a Host-only adapter for them to communicate to each other as well as enabling connection (eg: SSH, etc) from my Mac to the VMs. For more details how to do that, refer to my previous post which I setup a similar topology for my IBM Cloud Private experiment here

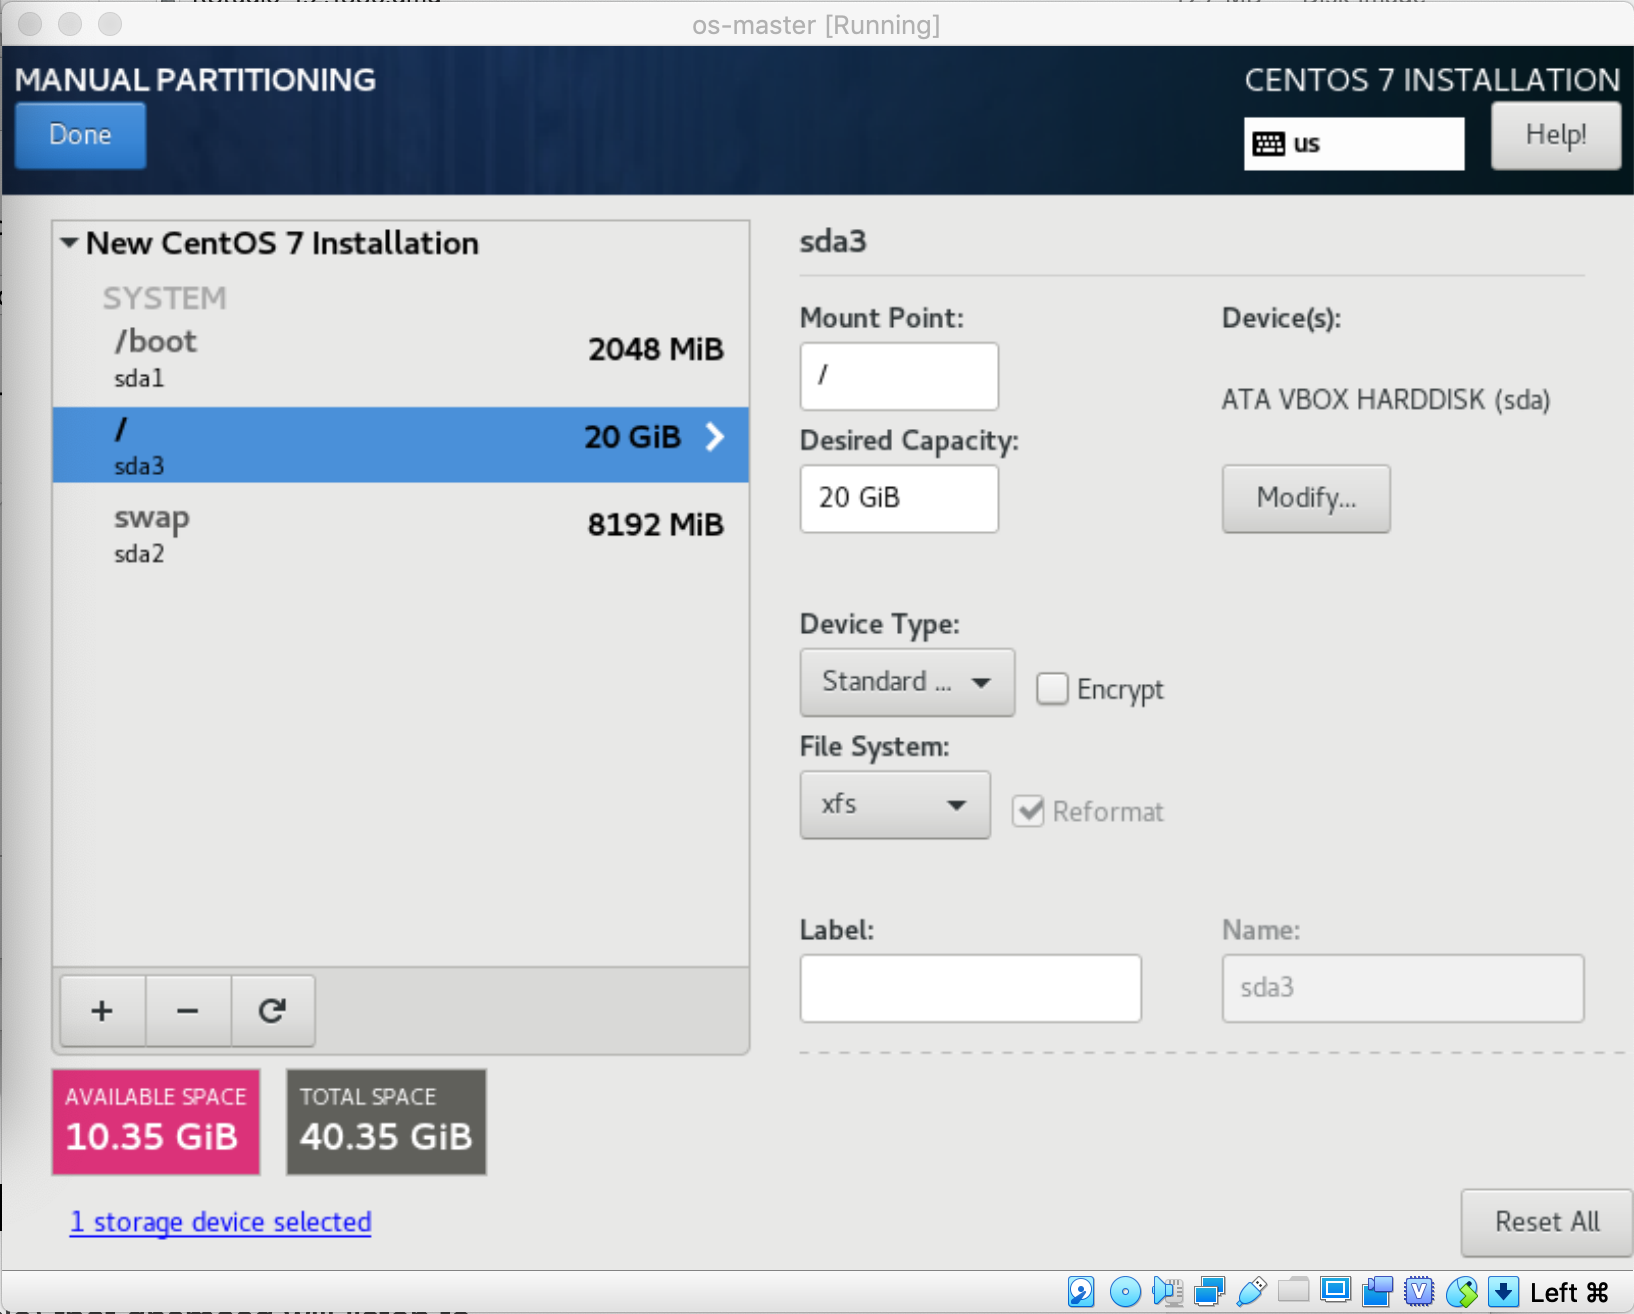
Launch the OS installation by following the instruction as if you’re installing a normal CentOS machine. In this case, I manually created the partition as following

Partitioning for master VM

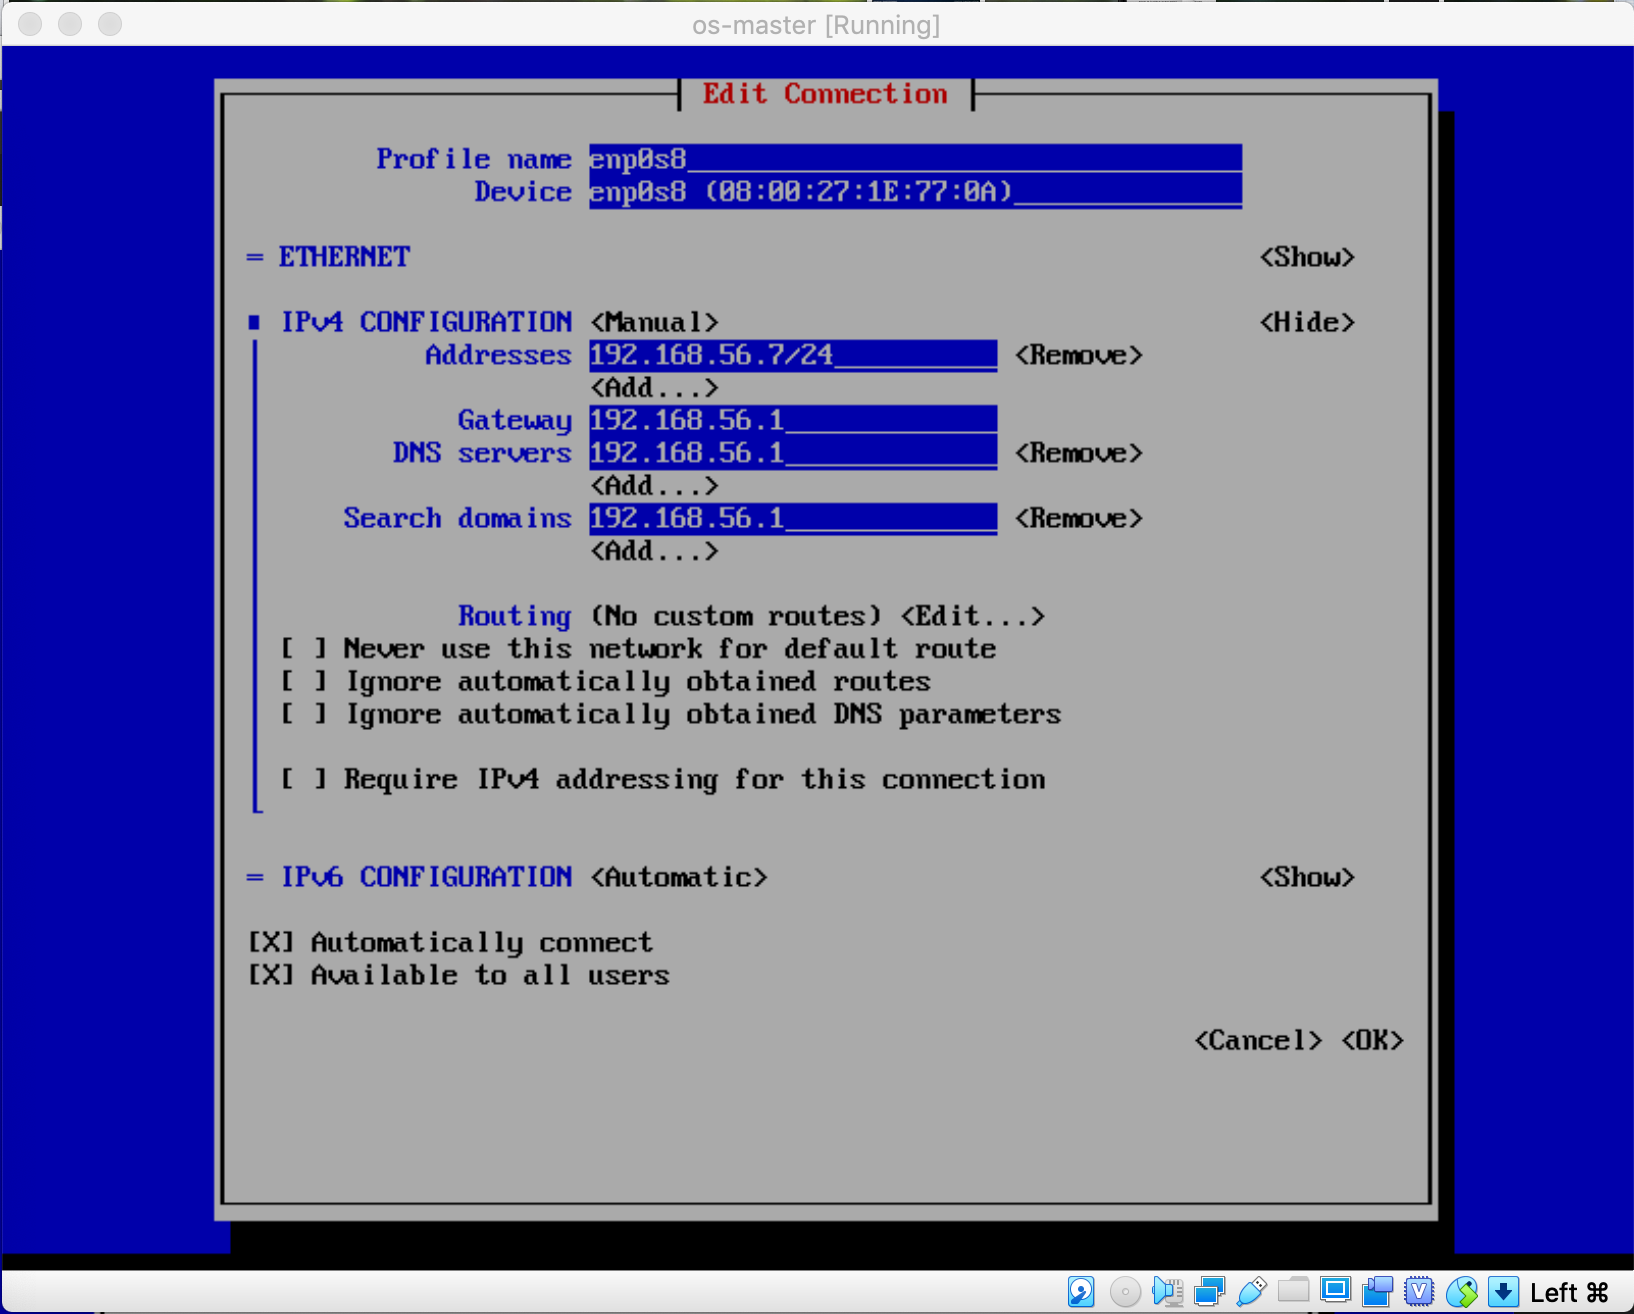
And here is the network configuration for the interface associated to the Host-only adapter for the master VM which you can replicate to the remaining 2 nodes (compute: 192.168.56.8 and infra: 192.168.56.9) accordingly ($ nmtui)

Master’s Host-only subnet configuration

Setup the base tools

Once you have the 3 VMs prepared with CentOS 7 installed and configured, we can install the base tools necessary for the installation process on all nodes.

Put this script into a bash file:

$ vi base_bash.sh
#!/bin/bash
# simple bash script to install base packages for OKD v3.9

sudo yum -y update
# Install the CentOS OpenShift Origin v3.9 repo & all base packages
sudo yum -y install centos-release-openshift-origin39 wget git net-tools \
    bind-utils yum-utils iptables-services bridge-utils bash-completion \
    kexec-tools sos psacct vim git mlocate
# create .ssh folder in /root. Update the path if you plan to use a non-root
# user with Ansible.
mkdir -p /root/.ssh
# create passwordless ssh key for root.
ssh-keygen -t rsa \
    -f /root/.ssh/id_rsa -N ''
sudo yum -y update
# Install the Extra Packages for Enterprise Linux (EPEL) repository
sudo yum -y install \
    https://dl.fedoraproject.org/pub/epel/epel-release-latest-7.noarch.rpm
# disable EPEL repo to prevent package conflicts
sudo sed -i -e "s/^enabled=1/enabled=0/" /etc/yum.repos.d/epel.repo
# Install PyOpenSSL from EpEL repo
sudo yum -y --enablerepo=epel install pyOpenSSL
# install ansible-2.4.3.0 from CentOS archives
sudo yum -y install \
    https://cbs.centos.org/kojifiles/packages/ansible/2.4.3.0/1.el7/noarch/ansible-2.4.3.0-1.el7.noarch.rpm
sudo yum -y install \
    https://cbs.centos.org/kojifiles/packages/ansible/2.4.3.0/1.el7/noarch/ansible-doc-2.4.3.0-1.el7.noarch.rpm
# Reboot system to apply any kernel updates
sudo reboot

Execute the script:

$ bash base_bash.sh

OpenShift requires wildcard DNS resolution in order to resolve OpenShift routes. This can be configured either with an internal DNS resolver (eg: DNSMasq), or by using a public wildcard DNS resolver like xip.io or nip.io.
To make it simple, I use the xip.io option. With xip.io, a DNS entry like this: something.cool.<IP_ADDRESS>.xip.io will be resolved to IP_ADDRESS ip (the node needs to be connected to the internet). For example:

[root@master ~]# ping -c3  duyhard.master.192.168.56.7.xip.io
PING duyhard.master.192.168.56.7.xip.io (192.168.56.7) 56(84) bytes of data.
64 bytes from master (192.168.56.7): icmp_seq=1 ttl=64 time=0.041 ms
64 bytes from master (192.168.56.7): icmp_seq=2 ttl=64 time=0.051 ms
64 bytes from master (192.168.56.7): icmp_seq=3 ttl=64 time=0.050 ms

Now, run these commands on each node accordingly to set up proper host names

On master: $ hostctl set-hostname master.192.168.56.7.xip.io
On infra: $ hostctl set-hostname infra.192.168.56.9.xip.io
On compute: $ hostctl set-hostname compute.192.168.56.8.xip.io 

And then edit the /etc/hosts file in all nodes to be like this:

$ vi /etc/hosts 

192.168.56.7 master master.192.168.56.7.xip.io
192.168.56.9 infra infra.192.168.56.9.xip.io
192.168.56.8 compute compute.192.168.56.8.xip.io

Now enable the ssh access among all nodes by copying the public keys for each nodes to the remaining ones, run this command on all nodes:

$ ssh-copy-id master.192.168.56.7.xip.io && ssh-copy-id infra.192.168.56.9.xip.io && ssh-copy-id compute.192.168.56.8.xip.io

You need to enter the password for the user being used

Once done, install Docker 1.13.1 on all nodes:

$ yum install -y docker-1.13.1 && systemctl enable --now docker

Now, lets install OpenShift using openshift-ansible. The OpenShift (v3.9) distribution we’re about to install is OKD, the upstream version of OpenShift which’s
fully opensourced and is used as a basis for OpenShift dedicated, OpenShift online and OpenShift enterprise.

$ yum install -y openshift-ansible

Configure inventory file for OpenShift installation

$ cd /etc/ansible
$ mv hosts hosts.bk && vi ./hosts

[OSEv3:children]
masters
nodes
etcd

[OSEv3:vars]
openshift_deployment_type=origin
os_firewall_use_firewalld=True
ansible_ssh_user=root
openshift_master_identity_providers=[{'name': 'htpasswd_auth', 'login': 'true', 'challenge': 'true', 'kind': 'HTPasswdPasswordIdentityProvider', 'filename': '/etc/origin/master/htpasswd'}]
openshift_pkg_version='-3.9.0'
openshift_master_default_subdomain=apps.okd.192.168.56.9.xip.io
openshift_disable_check=disk_availability,memory_availability
openshift_ip=192.168.56.7
openshift_ip_check=false

[masters]
master.192.168.56.7.xip.io

[nodes]
master.192.168.56.7.xip.io
infra.192.168.56.9.xip.io openshift_node_labels="{'region':'infra','zone':'default'}"
compute.192.168.56.8.xip.io openshift_node_labels="{'region':'primary','zone':'east'}"

[etcd]
master.192.168.56.7.xip.io

We’re using HTPasswd as Identity Provider for authenticating the access to the cluster, so lets create a user and store the information in /etc/origin/master/htpasswd
as configured in the inventory file:

$ mkdir -p /etc/origin/master
$ htpasswd -c /etc/origin/master/htpasswd root

Test to make sure all nodes are ready for the installation:

$ ansible all -m ping

[root@master ansible]# ansible all -m ping
infra.192.168.56.9.xip.io | SUCCESS => {
    "changed": false, 
    "ping": "pong"
}
compute.192.168.56.8.xip.io | SUCCESS => {
    "changed": false, 
    "ping": "pong"
}
master.192.168.56.7.xip.io | SUCCESS => {
    "changed": false, 
    "ping": "pong"
}

Run the prerequisites playbook to setup required resources and configuration, then execute the cluster installation playbook

$ cd /usr/share/ansible/openshift-ansible/playbooks/
$ ansible-playbook prerequisites.yml && ansible-playbook deploy_cluster.yml

The installation takes around 20 minutes or so, and you would see this message in the console as indicator of success:

PLAY RECAP **********************************************************************************
compute.192.168.56.8.xip.io : ok=130  changed=36   unreachable=0    failed=0   
infra.192.168.56.9.xip.io  : ok=130  changed=36   unreachable=0    failed=0   
localhost                  : ok=12   changed=0    unreachable=0    failed=0   
master.192.168.56.7.xip.io : ok=579  changed=108  unreachable=0    failed=0   


INSTALLER STATUS ***************************************************************************
Initialization             : Complete (0:00:25)
Health Check               : Complete (0:00:24)
etcd Install               : Complete (0:00:30)
Master Install             : Complete (0:01:50)
Master Additional Install  : Complete (0:01:34)
Node Install               : Complete (0:04:52)
Hosted Install             : Complete (0:01:11)
Web Console Install        : Complete (0:00:53)
Service Catalog Install    : Complete (0:03:07)

Use oc cli command to quickly check the cluster:

root@master playbooks]# oc get nodes
NAME                          STATUS    ROLES     AGE       VERSION
compute.192.168.56.8.xip.io   Ready     compute   8m        v1.9.1+a0ce1bc657
infra.192.168.56.9.xip.io     Ready     <none>    8m        v1.9.1+a0ce1bc657
master.192.168.56.7.xip.io    Ready     master    2h        v1.9.1+a0ce1bc657

Create a new user to access your cluster

[root@master playbooks]# htpasswd -b /etc/origin/master/htpasswd \
> duynguyen spiritedengineering.net
Adding password for user duynguyen

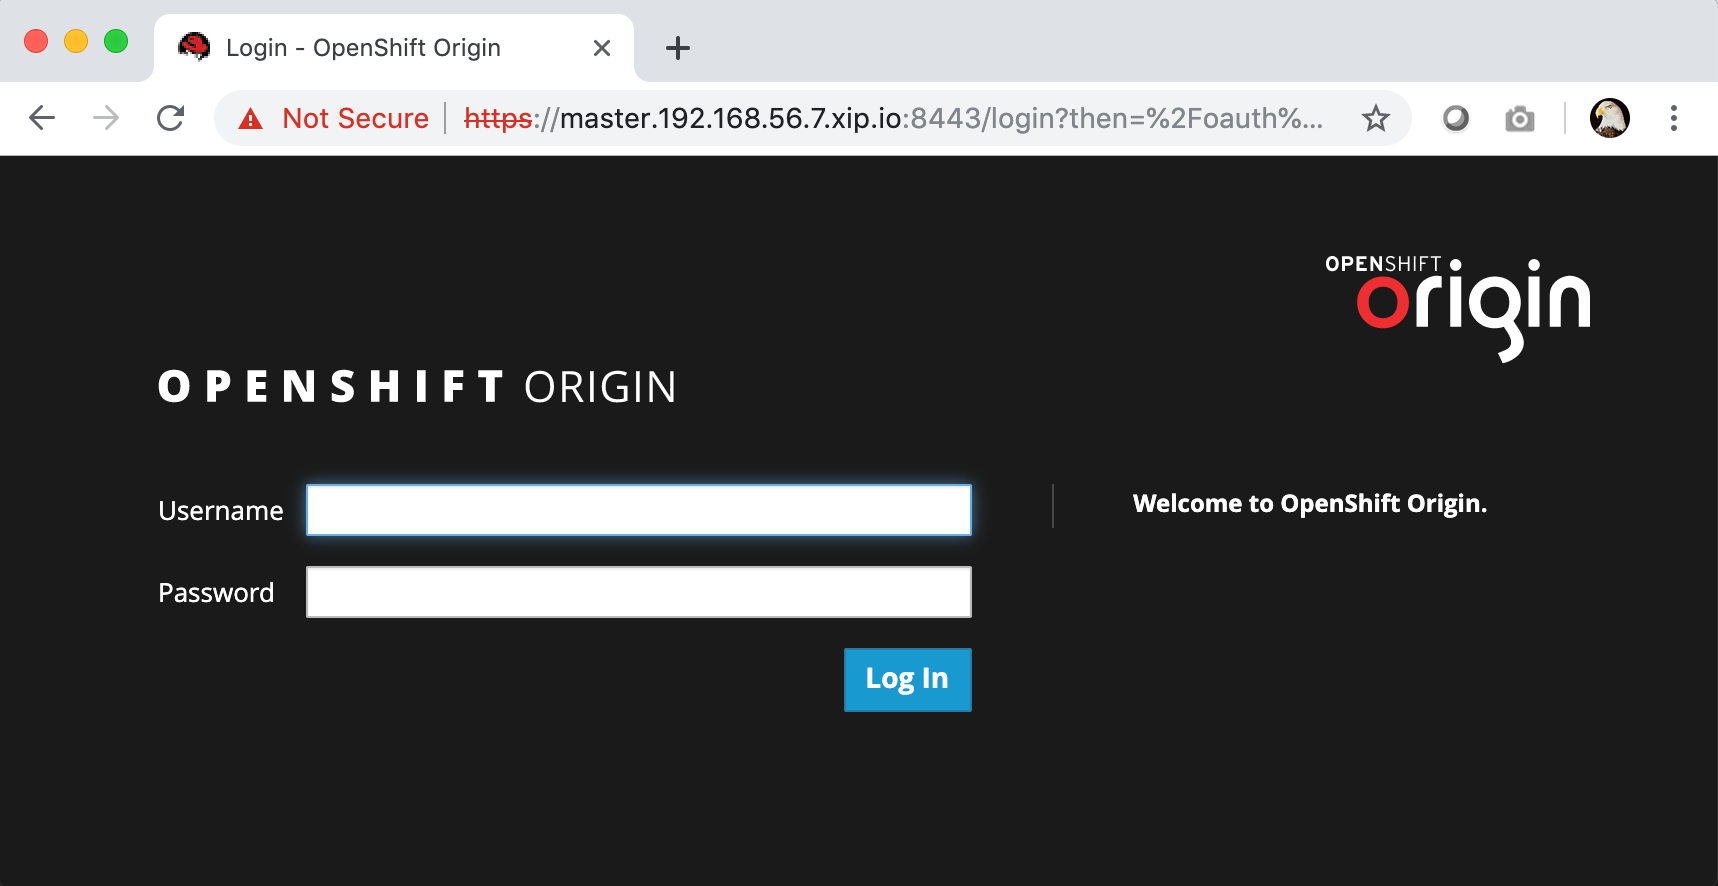
Now you can access the console GUI via your browser: https://master.192.168.56.7.xip.io:8443

Login screen

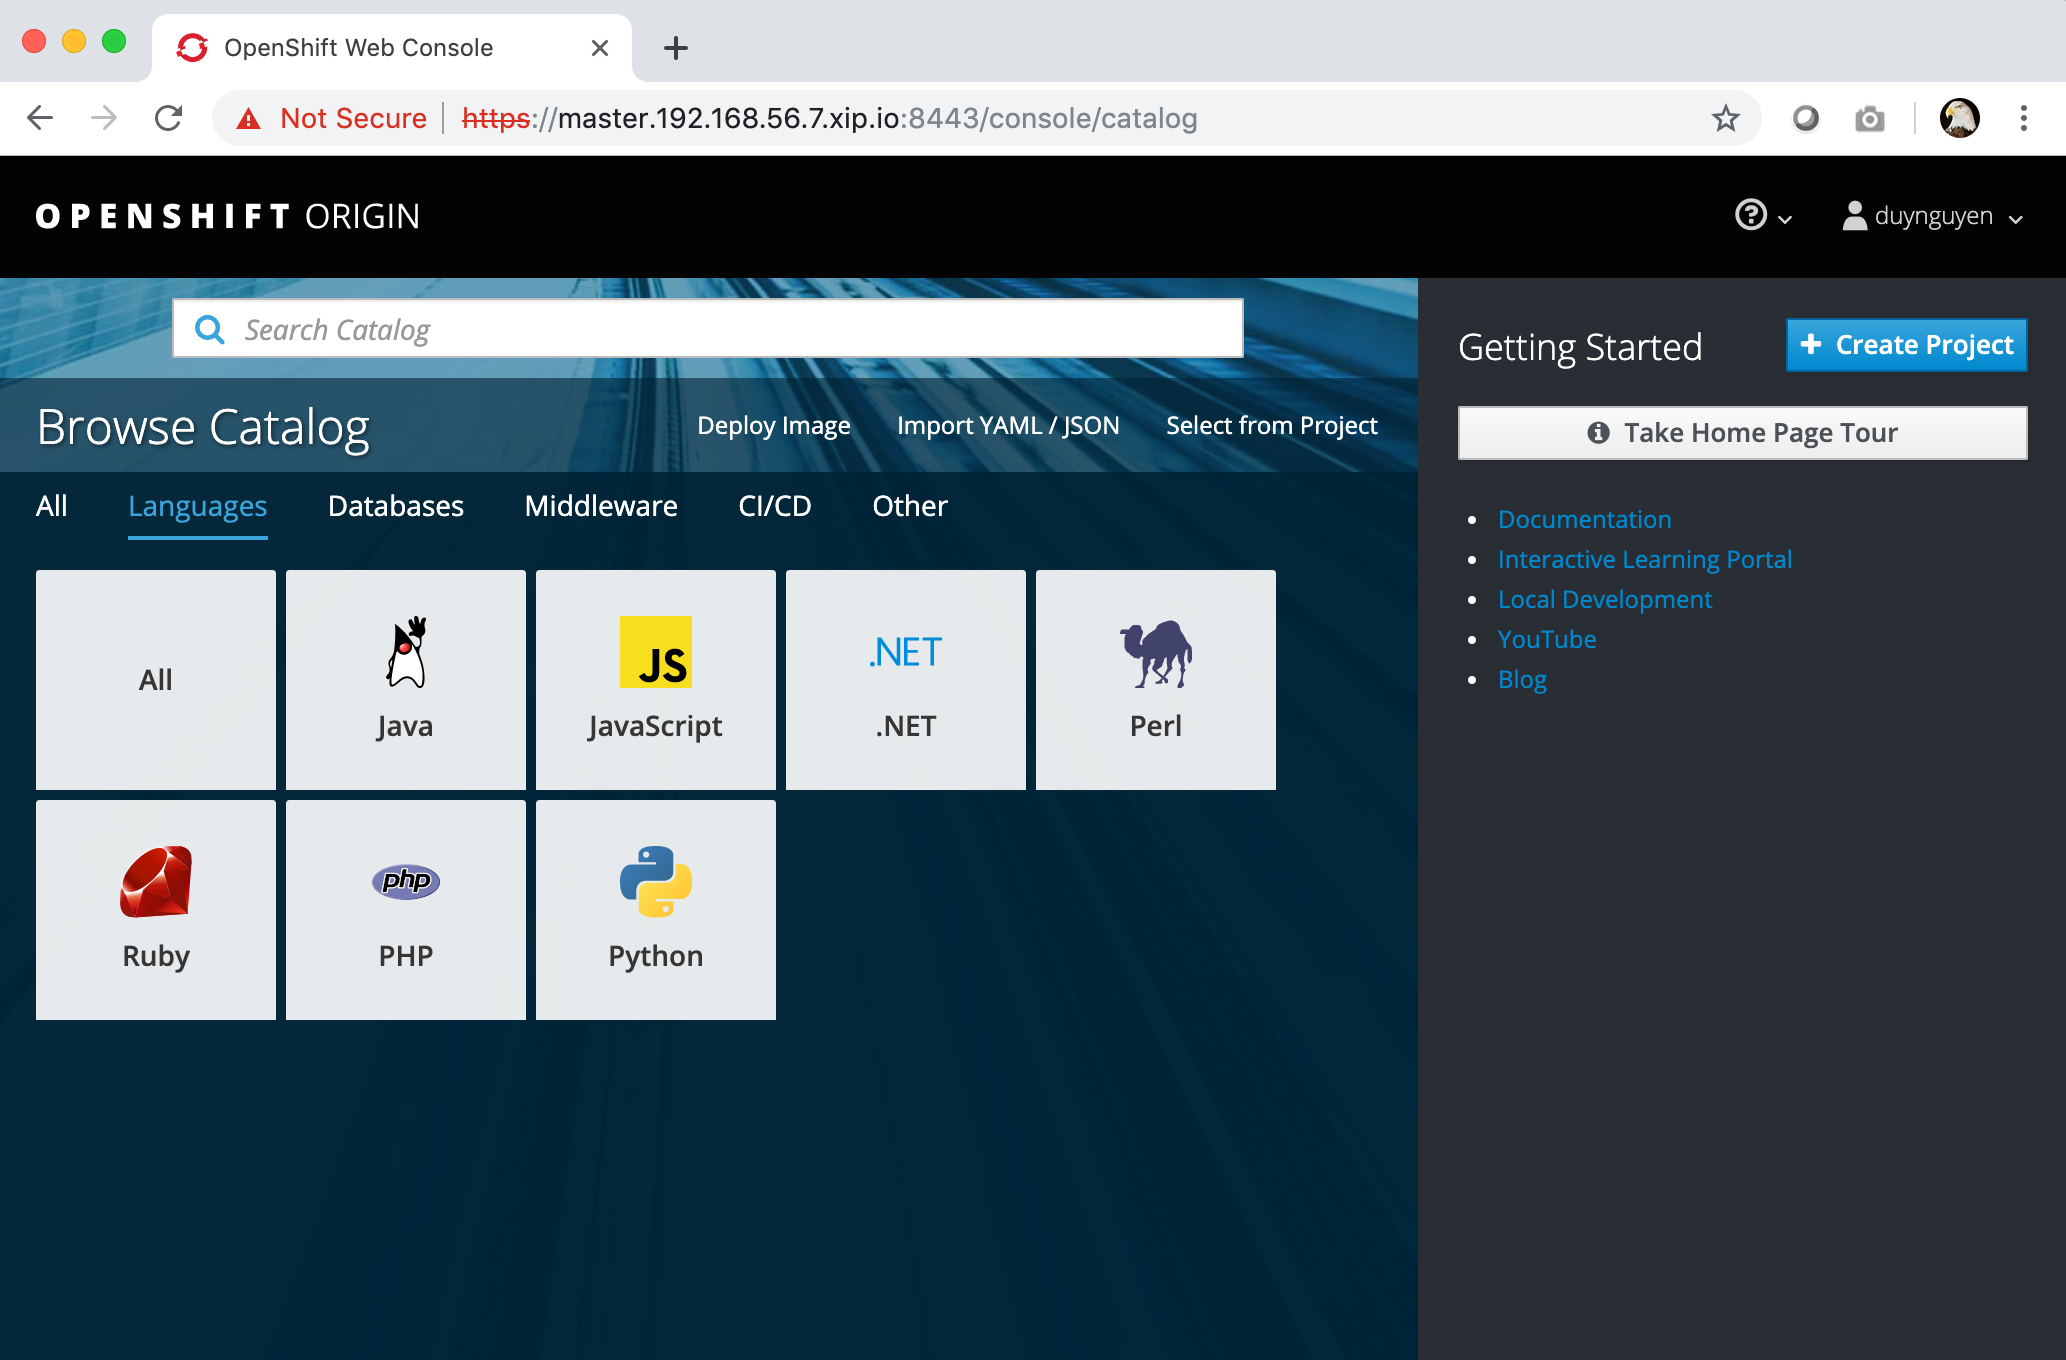
After providing the uesr name / password that you created using HTPasswd, you will see the beautiful OpenShift catalog

Catalog view

In the next posts, I will discuss how to develop and deploy applications on the OpenShift cluster. Stay turned!