
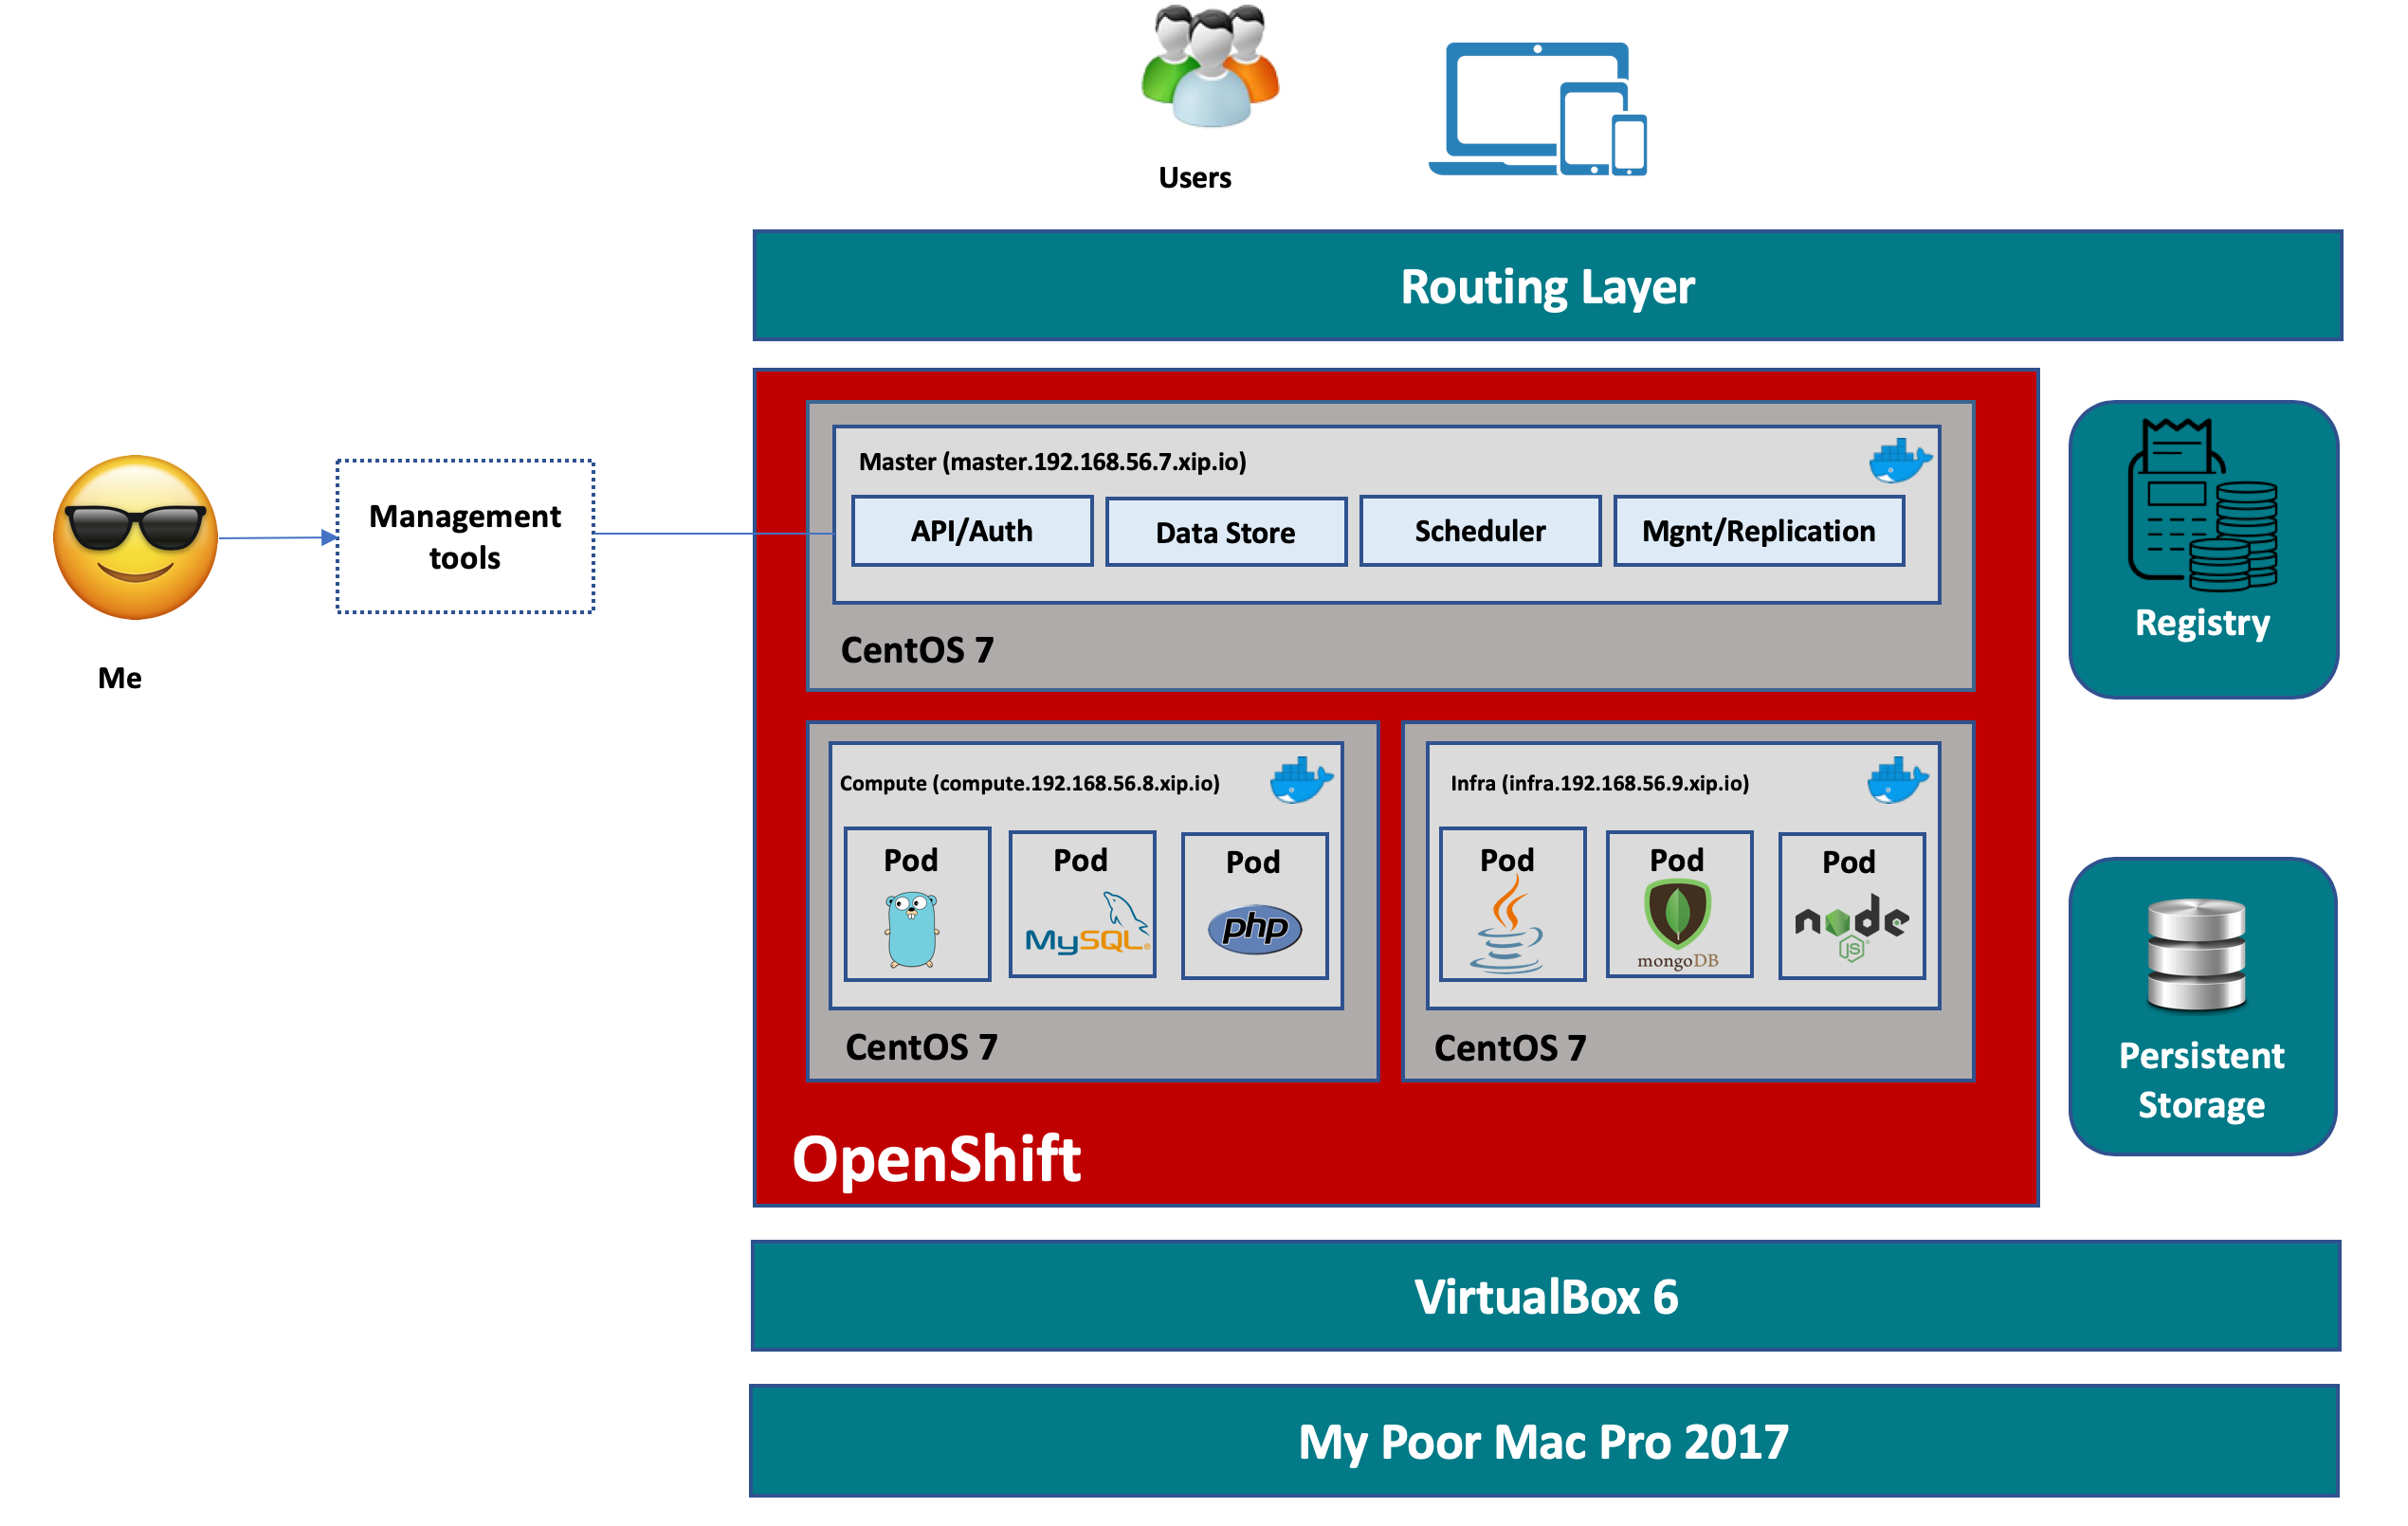
Despite the minimum infrastructure requirement for an OpenShift cluster is 4 CPUs, 16 GB RAM for master, 8 GB RAM for nodes, and a lot more, I decided to give it a go on my poor little Mac, using VirtualBox.
Here is how the cluster will look like:
Prepare the VMs
In this experiment, I’m using VirtualBox 6.0 for Mac, and CentOS 7 Minimal base image for all nodes in the cluster. First we need to make sure all the nodes can communicate to each other and to the internet. I use NAT adapter to to enable internet connectivity from the VMs through the shared internet connection on my Mac, and attach all VMs to a Host-only adapter for them to communicate to each other as well as enabling connection (eg: SSH, etc) from my Mac to the VMs. For more details how to do that, refer to my previous post which I setup a similar topology for my IBM Cloud Private experiment here
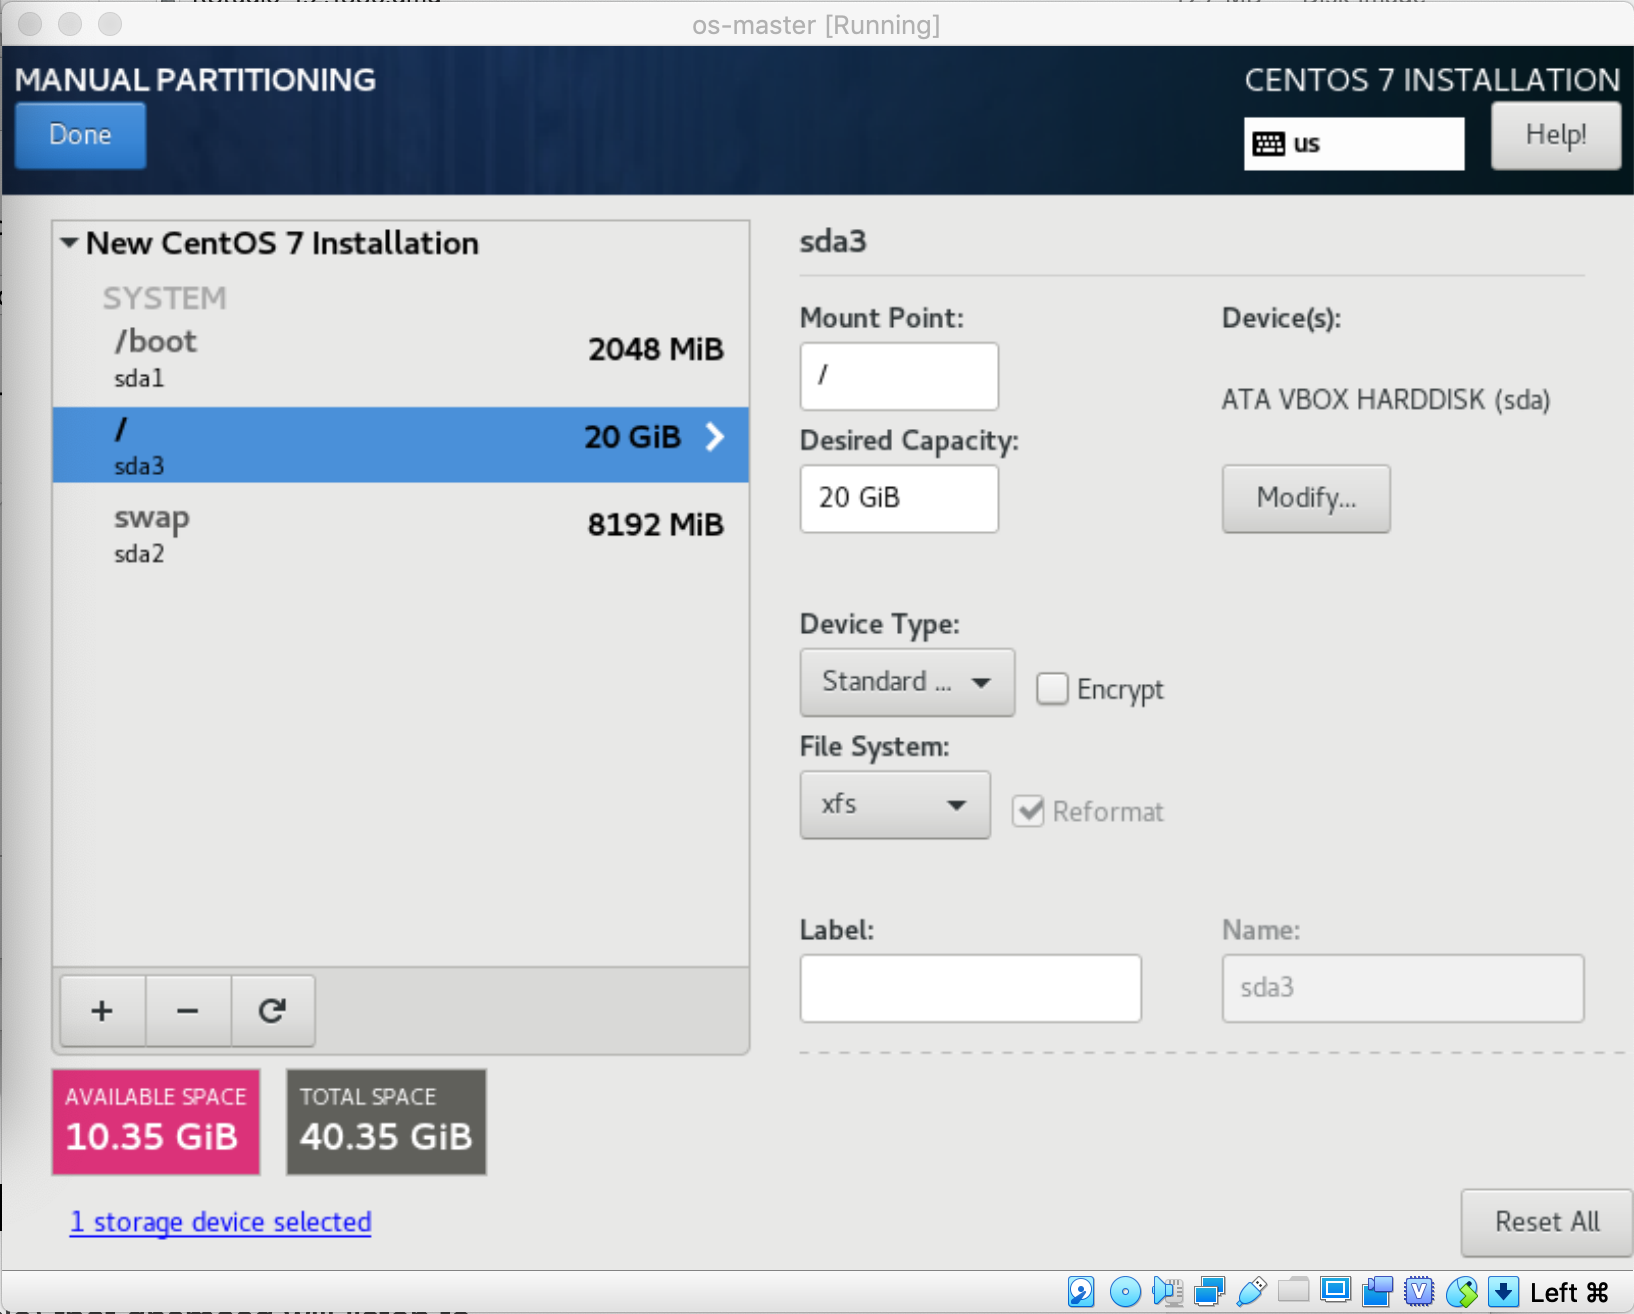
Launch the OS installation by following the instruction as if you’re installing a normal CentOS machine. In this case, I manually created the partition as following
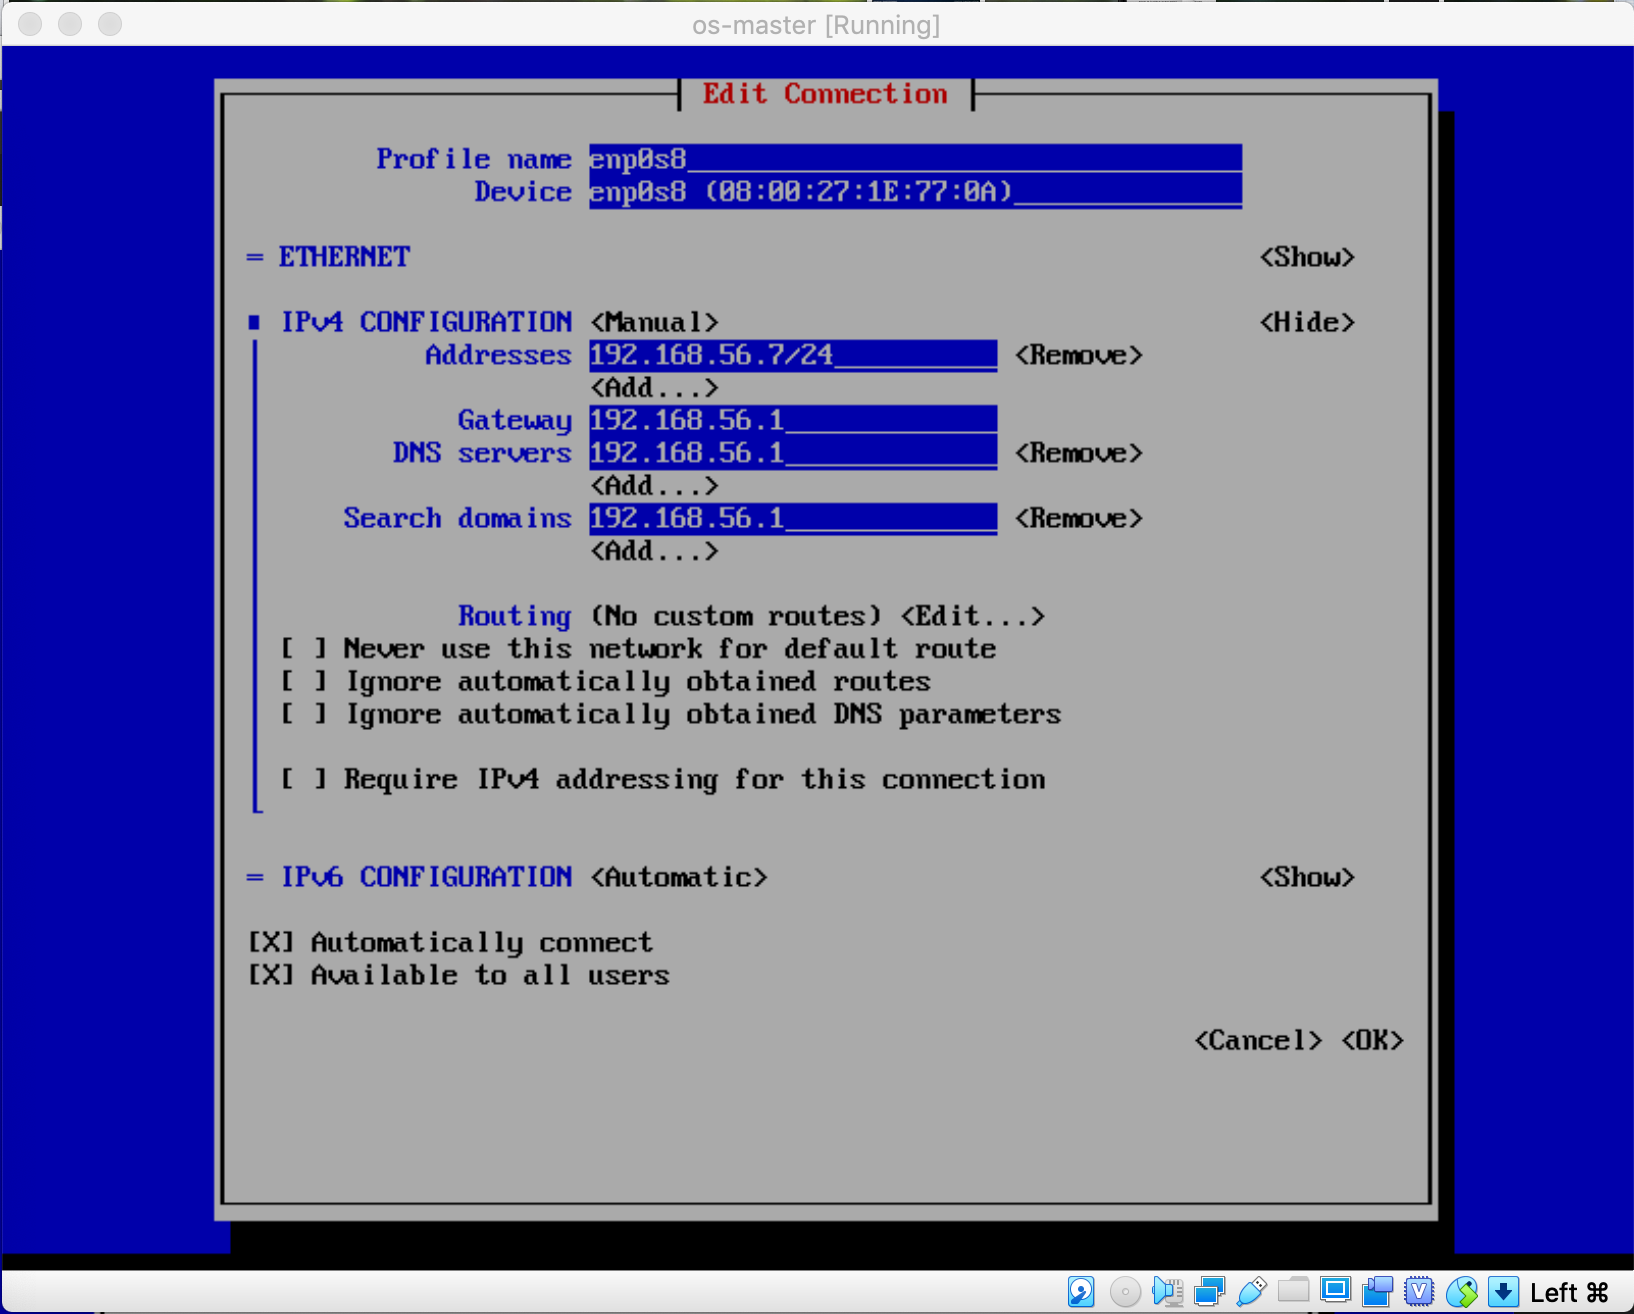
And here is the network configuration for the interface associated to the Host-only adapter for the master VM which you can replicate to the remaining 2 nodes (compute: 192.168.56.8 and infra: 192.168.56.9) accordingly ($ nmtui)
Setup the base tools
Once you have the 3 VMs prepared with CentOS 7 installed and configured, we can install the base tools necessary for the installation process on all nodes.
Put this script into a bash file:
$ vi base_bash.sh
#!/bin/bash
# simple bash script to install base packages for OKD v3.9

sudo yum -y update
# Install the CentOS OpenShift Origin v3.9 repo & all base packages
sudo yum -y install centos-release-openshift-origin39 wget git net-tools \
    bind-utils yum-utils iptables-services bridge-utils bash-completion \
    kexec-tools sos psacct vim git mlocate
# create .ssh folder in /root. Update the path if you plan to use a non-root
# user with Ansible.
mkdir -p /root/.ssh
# create passwordless ssh key for root.
ssh-keygen -t rsa \
    -f /root/.ssh/id_rsa -N ''
sudo yum -y update
# Install the Extra Packages for Enterprise Linux (EPEL) repository
sudo yum -y install \
    https://dl.fedoraproject.org/pub/epel/epel-release-latest-7.noarch.rpm
# disable EPEL repo to prevent package conflicts
sudo sed -i -e "s/^enabled=1/enabled=0/" /etc/yum.repos.d/epel.repo
# Install PyOpenSSL from EpEL repo
sudo yum -y --enablerepo=epel install pyOpenSSL
# install ansible-2.4.3.0 from CentOS archives
sudo yum -y install \
    https://cbs.centos.org/kojifiles/packages/ansible/2.4.3.0/1.el7/noarch/ansible-2.4.3.0-1.el7.noarch.rpm
sudo yum -y install \
    https://cbs.centos.org/kojifiles/packages/ansible/2.4.3.0/1.el7/noarch/ansible-doc-2.4.3.0-1.el7.noarch.rpm
# Reboot system to apply any kernel updates
sudo reboot
Execute the script:
$ bash base_bash.shOpenShift requires wildcard DNS resolution in order to resolve OpenShift routes. This can be configured either with an internal DNS resolver (eg: DNSMasq), or by using a public wildcard DNS resolver like xip.io or nip.io.
To make it simple, I use the xip.io option. With xip.io, a DNS entry like this: something.cool.<IP_ADDRESS>.xip.io will be resolved to IP_ADDRESS ip (the node needs to be connected to the internet). For example:
[root@master ~]# ping -c3  duyhard.master.192.168.56.7.xip.io
PING duyhard.master.192.168.56.7.xip.io (192.168.56.7) 56(84) bytes of data.
64 bytes from master (192.168.56.7): icmp_seq=1 ttl=64 time=0.041 ms
64 bytes from master (192.168.56.7): icmp_seq=2 ttl=64 time=0.051 ms
64 bytes from master (192.168.56.7): icmp_seq=3 ttl=64 time=0.050 ms
Now, run these commands on each node accordingly to set up proper host names
On master: $ hostctl set-hostname master.192.168.56.7.xip.io
On infra: $ hostctl set-hostname infra.192.168.56.9.xip.io
On compute: $ hostctl set-hostname compute.192.168.56.8.xip.io
And then edit the /etc/hosts file in all nodes to be like this:
$ vi /etc/hosts

192.168.56.7 master master.192.168.56.7.xip.io
192.168.56.9 infra infra.192.168.56.9.xip.io
192.168.56.8 compute compute.192.168.56.8.xip.io
Now enable the ssh access among all nodes by copying the public keys for each nodes to the remaining ones, run this command on all nodes:
$ ssh-copy-id master.192.168.56.7.xip.io && ssh-copy-id infra.192.168.56.9.xip.io && ssh-copy-id compute.192.168.56.8.xip.ioYou need to enter the password for the user being used
Once done, install Docker 1.13.1 on all nodes:
$ yum install -y docker-1.13.1 && systemctl enable --now dockerNow, lets install OpenShift using openshift-ansible. The OpenShift (v3.9) distribution we’re about to install is OKD, the upstream version of OpenShift which’s
fully opensourced and is used as a basis for OpenShift dedicated, OpenShift online and OpenShift enterprise.
$ yum install -y openshift-ansibleConfigure inventory file for OpenShift installation
$ cd /etc/ansible
$ mv hosts hosts.bk && vi ./hosts

[OSEv3:children]
masters
nodes
etcd

[OSEv3:vars]
openshift_deployment_type=origin
os_firewall_use_firewalld=True
ansible_ssh_user=root
openshift_master_identity_providers=[{'name': 'htpasswd_auth', 'login': 'true', 'challenge': 'true', 'kind': 'HTPasswdPasswordIdentityProvider', 'filename': '/etc/origin/master/htpasswd'}]
openshift_pkg_version='-3.9.0'
openshift_master_default_subdomain=apps.okd.192.168.56.9.xip.io
openshift_disable_check=disk_availability,memory_availability
openshift_ip=192.168.56.7
openshift_ip_check=false

[masters]
master.192.168.56.7.xip.io

[nodes]
master.192.168.56.7.xip.io
infra.192.168.56.9.xip.io openshift_node_labels="{'region':'infra','zone':'default'}"
compute.192.168.56.8.xip.io openshift_node_labels="{'region':'primary','zone':'east'}"

[etcd]
master.192.168.56.7.xip.io
We’re using HTPasswd as Identity Provider for authenticating the access to the cluster, so lets create a user and store the information in /etc/origin/master/htpasswd
as configured in the inventory file:
$ mkdir -p /etc/origin/master
$ htpasswd -c /etc/origin/master/htpasswd root
Test to make sure all nodes are ready for the installation:
$ ansible all -m ping

[root@master ansible]# ansible all -m ping
infra.192.168.56.9.xip.io | SUCCESS => {
    "changed": false,
    "ping": "pong"
}
compute.192.168.56.8.xip.io | SUCCESS => {
    "changed": false,
    "ping": "pong"
}
master.192.168.56.7.xip.io | SUCCESS => {
    "changed": false,
    "ping": "pong"
}
Run the prerequisites playbook to setup required resources and configuration, then execute the cluster installation playbook
$ cd /usr/share/ansible/openshift-ansible/playbooks/
$ ansible-playbook prerequisites.yml && ansible-playbook deploy_cluster.yml
The installation takes around 20 minutes or so, and you would see this message in the console as indicator of success:
PLAY RECAP **********************************************************************************
compute.192.168.56.8.xip.io : ok=130  changed=36   unreachable=0    failed=0
infra.192.168.56.9.xip.io  : ok=130  changed=36   unreachable=0    failed=0
localhost                  : ok=12   changed=0    unreachable=0    failed=0
master.192.168.56.7.xip.io : ok=579  changed=108  unreachable=0    failed=0


INSTALLER STATUS ***************************************************************************
Initialization             : Complete (0:00:25)
Health Check               : Complete (0:00:24)
etcd Install               : Complete (0:00:30)
Master Install             : Complete (0:01:50)
Master Additional Install  : Complete (0:01:34)
Node Install               : Complete (0:04:52)
Hosted Install             : Complete (0:01:11)
Web Console Install        : Complete (0:00:53)
Service Catalog Install    : Complete (0:03:07)
Use oc cli command to quickly check the cluster:
root@master playbooks]# oc get nodes
NAME                          STATUS    ROLES     AGE       VERSION
compute.192.168.56.8.xip.io   Ready     compute   8m        v1.9.1+a0ce1bc657
infra.192.168.56.9.xip.io     Ready     <none>    8m        v1.9.1+a0ce1bc657
master.192.168.56.7.xip.io    Ready     master    2h        v1.9.1+a0ce1bc657
Create a new user to access your cluster
[root@master playbooks]# htpasswd -b /etc/origin/master/htpasswd \
> duynguyen spiritedengineering.net
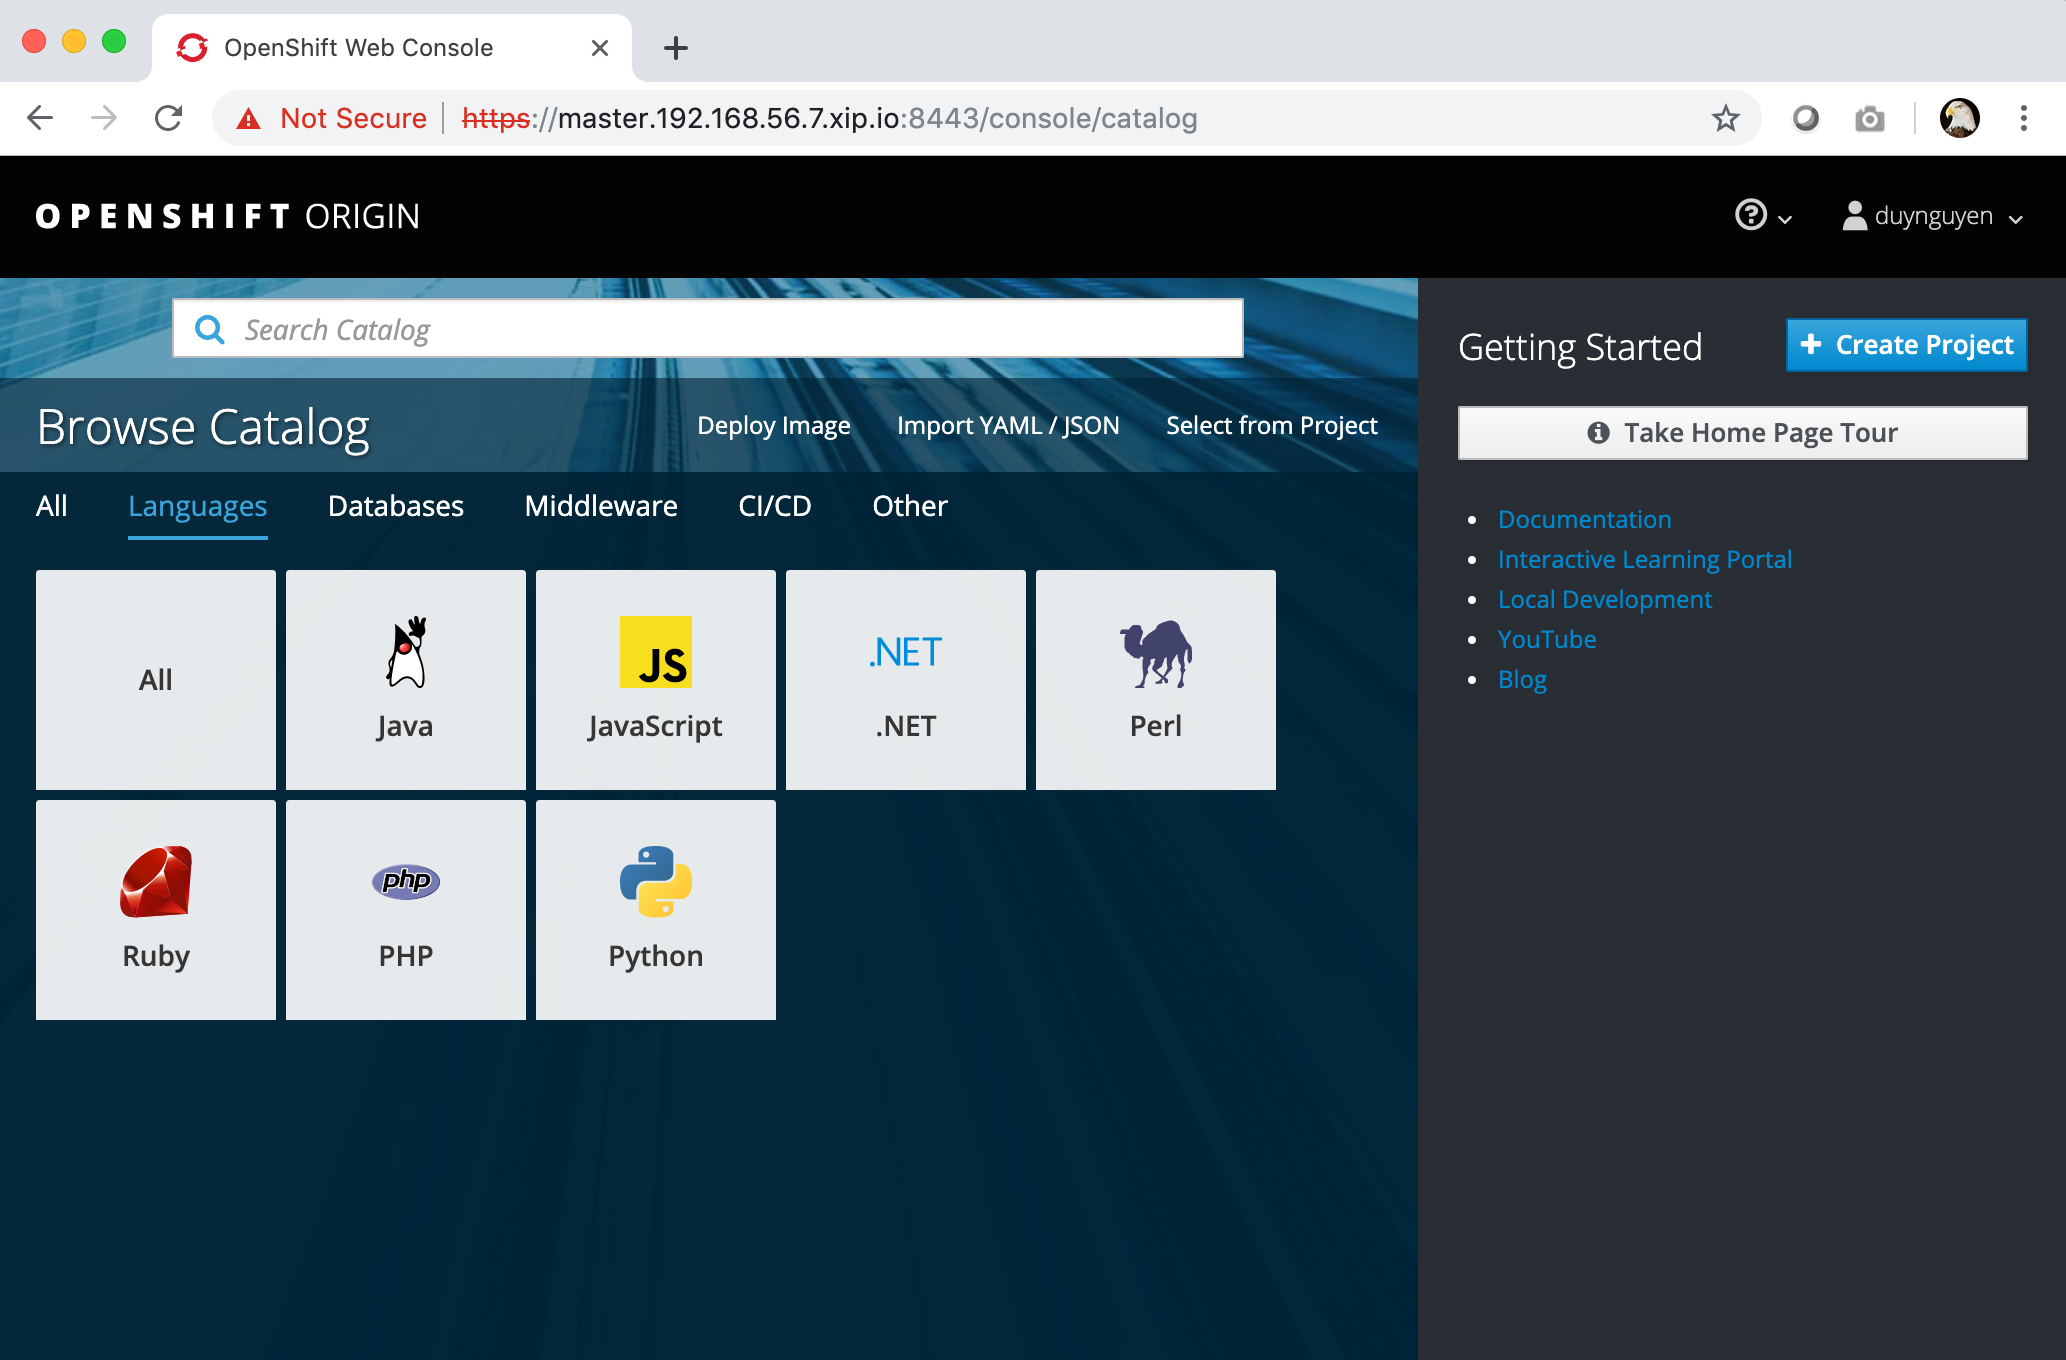
Adding password for user duynguyenNow you can access the console GUI via your browser: https://master.192.168.56.7.xip.io:8443
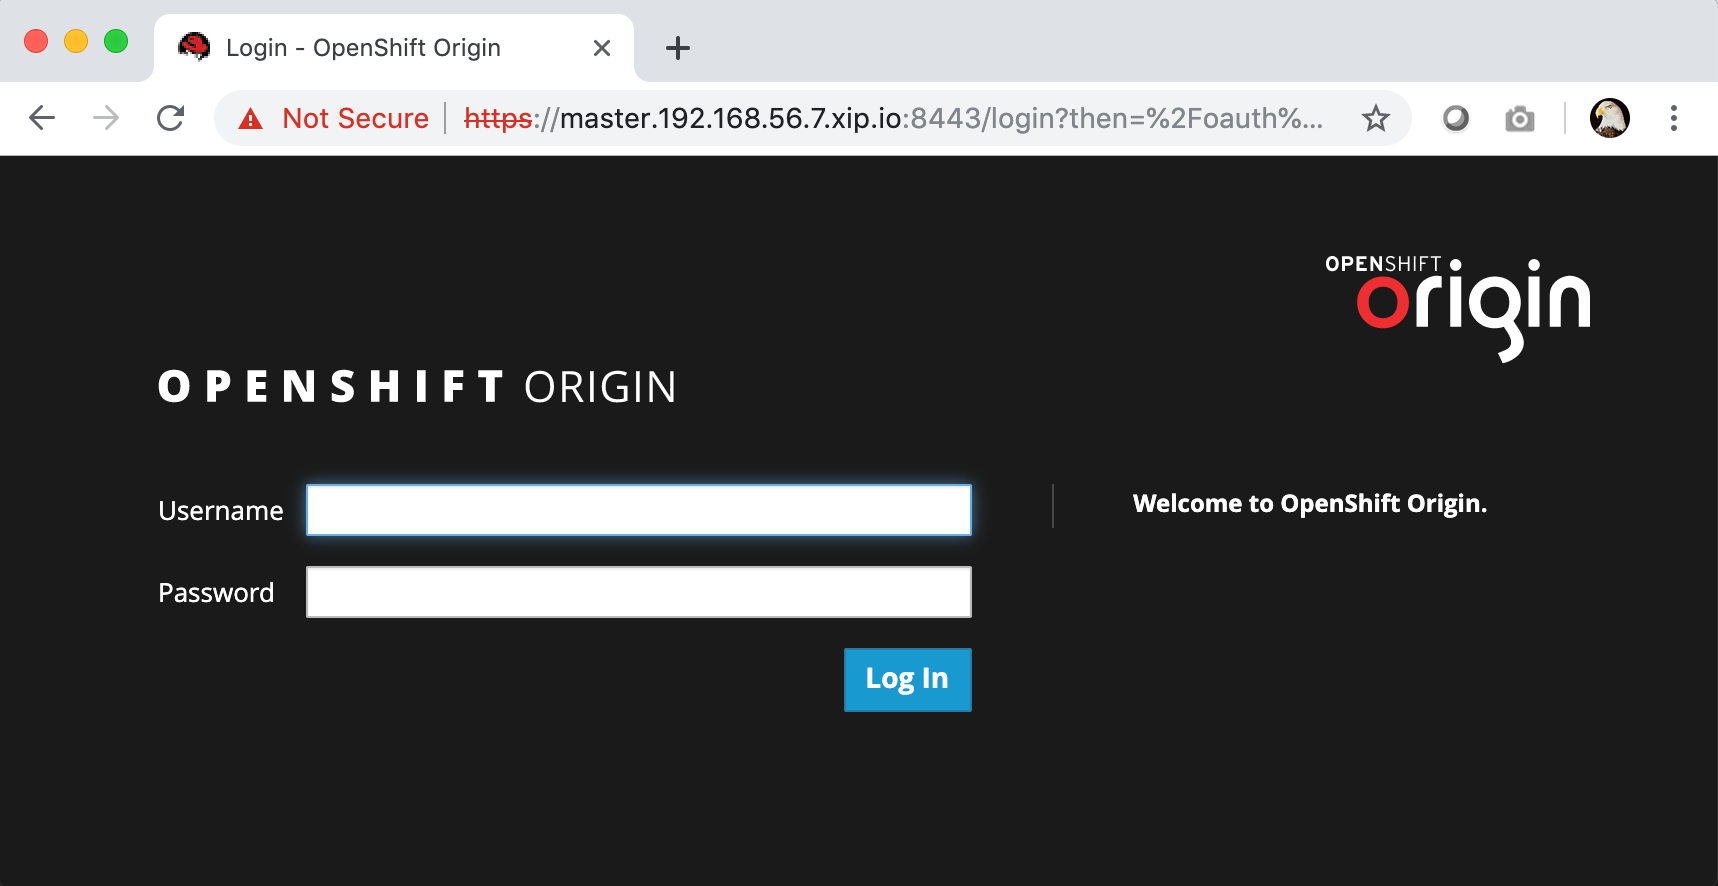
After providing the uesr name / password that you created using HTPasswd, you will see the beautiful OpenShift catalog
In the next posts, I will discuss how to develop and deploy applications on the OpenShift cluster. Stay turned!
whoah this blog is excellent i love reading your posts. Keep up the great work! You know, a lot of people are looking around for this information, you can aid them greatly.
Thank you!
With havin so much content do you ever run into any issues of plagorism or copyright violation? My website has a lot of unique content I’ve either authored myself or outsourced but it seems a lot of it is popping it up all over the web without my agreement. Do you know any techniques to help prevent content from being stolen? I’d really appreciate it.
Hi Ramesh,
Looks like it complains about the ports availability:
Error: ports in use: [80 8443 10250 53 8053]
You should check the master node to make sure those ports are free.
Regards – Duy
Hi Duy,
Good Day!
I have installed the Openshift successfully, with 1 Master 2 Nodes, please find below the results, post which I tried to start the “oc cluster up”, I am getting an error states below,
ERROR REPORT:
[root@master ~]# oc cluster up
error: FAIL
Error: a port needed by OpenShift is not available
Caused By:
Error: ports in use: [80 8443 10250 53 8053]
Console:
I am unable to view the console in the web browser with catalogs.
INSTALLATION FINAL REPORT:
PLAY RECAP *********************************************************************
compute.192.168.56.5.xip.io : ok=128 changed=20 unreachable=0 failed=0
infra.192.168.56.4.xip.io : ok=122 changed=17 unreachable=0 failed=0
localhost : ok=12 changed=0 unreachable=0 failed=0
master.192.168.56.3.xip.io : ok=575 changed=109 unreachable=0 failed=0
INSTALLER STATUS ***************************************************************
Initialization : Complete (0:02:33)
Health Check : Complete (0:02:48)
etcd Install : Complete (0:03:04)
Master Install : Complete (0:08:02)
Master Additional Install : Complete (0:04:12)
Node Install : Complete (0:10:20)
Hosted Install : Complete (0:06:07)
Web Console Install : Complete (0:01:57)
Service Catalog Install : Complete (0:09:59)
Please help here.