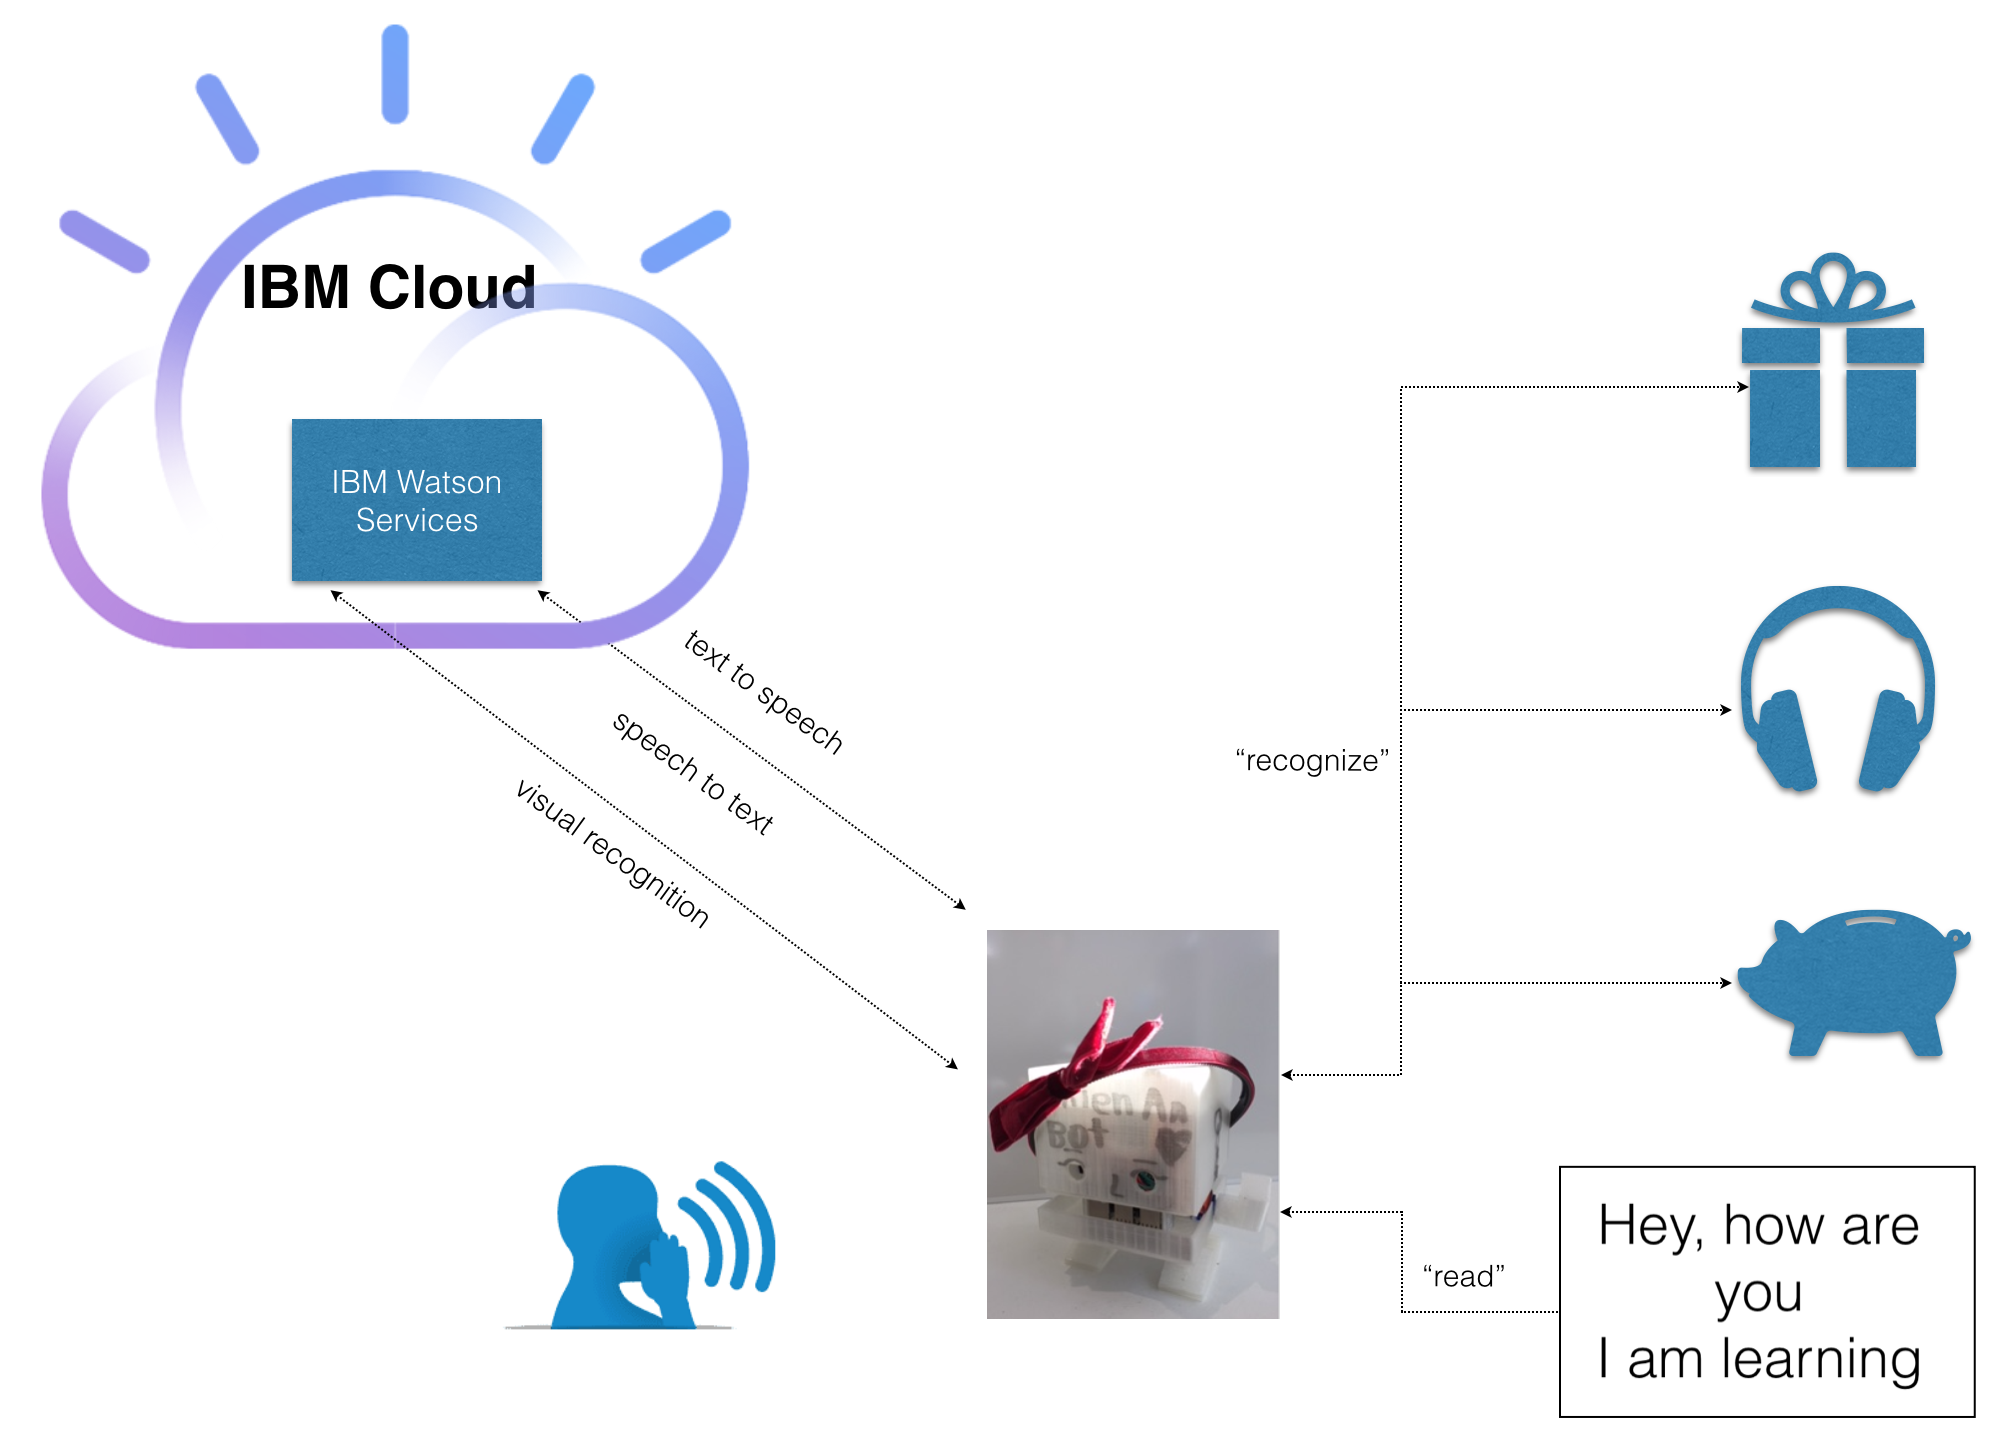
This post guides you through how to connect your Raspberry Pi to IBM Watson services and make a simple robot which can listen to your commands, recognize objects, report back in voice. It can also read text content in English.
If you follow the instruction (and lucky), you will have something like this:
Architecture overview
Hardware requirements
- A Raspberry Pi B. I use Raspberry 3 for this tutorial, which has built-in wifi. If you have other models, you need to make sure you have a Wifi dongle or other ways to get your Pi connected to the internet (eg: sharing the internet connection with your workstation through ethernet, etc)
- A speaker. I use an Anker A7910 mini speaker
- A Raspberry pi camera
Other requirements
- IBM Cloud account, free, click here
- Refer to this link to know how to setup your Pi. Try to get the latest OS version.
- Git, Node.js, npm on your Raspberry:
$sudo apt-get install nodejs npm node-semver
Steps to “cook” this recipe
Create Watson text to speech service
Follow this instruction (https://github.com/dnguyenv/distance-bot#create-bluemix-text-to-speech-service) to create a text to speech service in IBM Cloud environment. Again, it’s free.
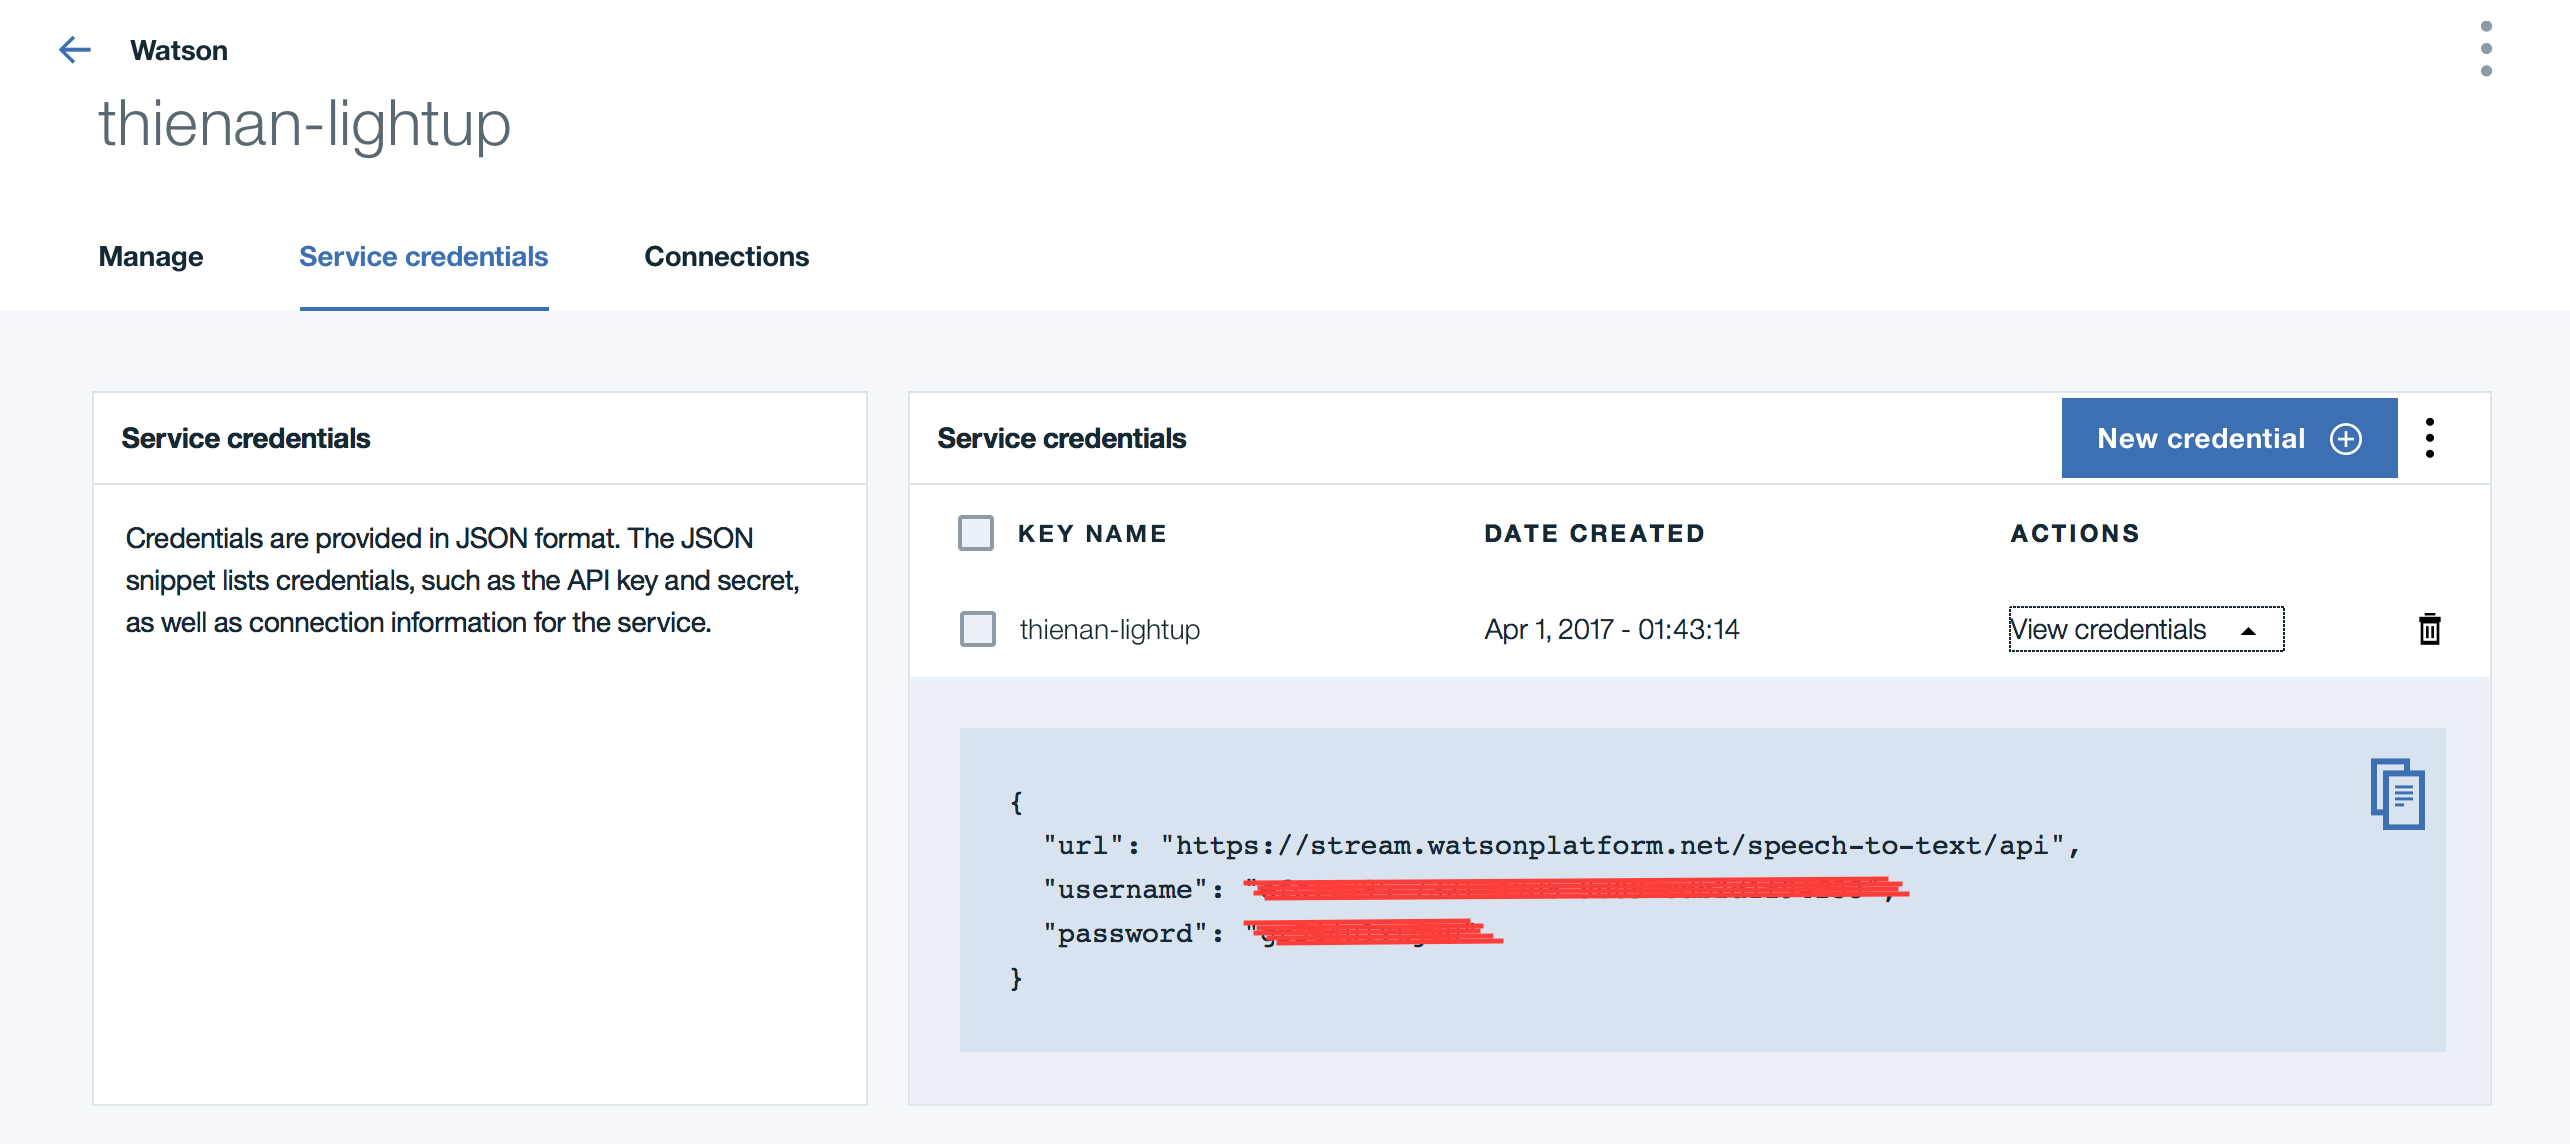
Create Watson speech to text service
Login to IBM Cloud (https://bluemix.net) with your registered ID, then Go to Catalog, Search for speech to text, or click here and select the service.

Name the service and credential if you want, or just leave them by default, Select Create
Once the service is created, go to Service credentials , View credentials section to record the username and password information. You will need it later for the app. You can always create a new credential to access the service as needed, by selecting New credential
Create Watson Visual Recognition service
Similarly to the Text To Speech and Speech To Text service, create a Visual Recognition service and then record the credentials to be used later in the code
Install OCR application on your Pi
$sudo apt-get install tesseract-ocr-eng
Clone the code and install dependencies
Clone the source code:
Get into your Pi using SSH or VNC client. From the terminal in your Raspberry Pi, perform this command to get the source code:
$sudo git clone https://github.com/dnguyenv/seebot.git
Put your Watson services credentials (Text to speech, Speech to text and Visual Recognition service) into the config.js file following the template. You also can configure other values in the file to meet your need.
Run the code:
$cd seebot

$sudo npm install

$sudo npm start
Now you can talk to the robot and experience what you see in the demo video.